Soloing for fun and profit, part 2: That burning (crusade) desire
Welcome to part 2 of my (several months in the making) guide to soloing WoW’s raid content! We’re off to WoW’s first expansion to tackle the bosses of Outland, as well as a few on Azeroth proper! With the exception of one raid, every BC raid still in the game is tuned for 25 level 70’s, which puts it as a bit more of a challenge than Classic’s 40-mans. Still, I can confirm that with one exception, every boss CAN be soloed, and this guide will tell you how.
Note once again that I’m writing this guide so that even people who are fairly new to WoW can tackle these raids. That means I’ll go over how to get to the raids, what to expect inside, and how to tackle each boss in-depth. If you’re familiar with the raids themselves and want to know how to face a particular boss, you can skip most of the article and head to the Bosses section of the raid you’re working on! That’s what this is here for, after all.
What’s changed at 90?
I figured that since my original guide hasn’t been updated for Mists yet, I’ll put this here and move it to the Classic section when I get that updated.
A lot has changed for enhance soloing at 90. First, our healing spells have been reduced to only three: Healing Surge (fast, single-target), Chain Heal (slow, multi-target), and Healing Rain (moderate, AOE over time). For soloing, you’ll want to use Healing Surge in pretty much every case. In addition, Healing Stream Totem is now a reactive totem, healing for a small but substantial amount every two seconds; it adds up to a bit over a Healing Surge. There are other healing things I’ll get into later.
Second, we actually have some DPS cooldowns! Yay! Ascendance is our big one from 87, allowing us to change into an Air Ascendant for 15 seconds, three-minute cooldown. During this time, all our auto-attacks and Stormstrike become ranged nature attacks with a 30-yard range. In addition, Stormstrike casts out a surge of multiple lightning bolts at its target. Really cool. Stormlash Totem allows for extra nature damage with every attack for 10 seconds, on a five-minute cooldown. Fire Elemental can now be used for extra damage, as its attacks will stack Searing Flames. And Feral Spirits don’t hit like dogs made of wet noodles anymore! Lastly, Bloodlust provides a useful way to boost all your attacks, as its haste increase actually benefits us now!
Lastly, there’s an assortment of other totems we can use to get out of tricky situations. Tremor, Earthgrab, Capacitor, and more. I won’t go into all of them, but they’re all useful in some way or another.
So, what talents and glyphs should you use while soloing? Well, here’s my setup which has worked for me thus far. Astral Shift can stack with Shamanistic Rage for a massive damage reduction, or be used separately to give you a second one. Earthgrab adds a root to your arsenal, and Totemic Restoration lets you recall totems to use them again sooner. Echo of the Elements is like having your own personal Dragonwrath, and has the chance to duplicate heals as well as damaging spells. Healing Tide Totem gives you a major self-heal over time. Finally, Primal Elementalist lets you control your elementals, giving you a larger toolkit to handle various encounters.
For glyphs, Healing Storm makes your Maelstrom healing much more effective, up to double for a 5-stack. It’s practically mandatory for serious soloing. Feral Spirits makes your wolves’ healing (which isn’t terribly bad) even better. Shamanistic Rage lets you clear magic debuffs, which is handy on some encounters. Minors don’t really matter, though Far Sight does let you get some cool screenshots inside raids!
This guide will be written assuming this talent/glyph setup. Others may work with varying degrees of effectiveness!
Dungeons
As with Classic’s dungeons, I won’t dwell on these long. Suffice it to say that at level 90, all BC dungeons, normal and heroic, are easily soloable. Hell, heroics were easy to solo at 85 even! Any dungeon that’s full of humanoids (which is pretty much all of them) is great for Netherweave farming, as well as an assortment of recipes for various professions that can only be farmed up in these dungeons. You’ll pick up a lot of greens or blues that can be disenchanted or sold for transmog purposes; BC and Classic greens are by far the most popular transmog options, so check each piece’s value before you junk it! In addition, recolors of Classic dungeon and raid sets are available as boss drops from an assortment of instances, some normal, some heroic. If you want to be a shaman rocking a Beaststalker look, you can farm it up! Or perhaps you’d like a purple Ten Storms? Add on some very unique weapon models, and you’ll see that BC dungeons can provide numerous transmog opportunities for you! Check the loot tables and see if there’s something that strikes your fancy.
For mount hunters, I will point out two dungeon drops: the Swift White Hawkstrider and the Raven Lord. The Swift White Hawkstrider is a low drop off of Kael’thas Sunstrider in heroic Magister’s Terrace on the Isle of Quel’danas, and the Raven Lord is a low drop off of Anzu in Sethekk Halls in Auchindoun, Terokkar Forest. Note that because these are only available on heroic, you’ve only got one shot at them per day. Kael’thas also has a chance to drop the Phoenix Hatchling pet, on both normal and heroic difficulties, so that can be farmed if you want to.

World Bosses
We finally get to talk about world bosses! Yay!
Burning Crusade launched with two world bosses: Doom Lord Kazzak and Doomwalker. Doom Lord Kazzak was an update of the original Lord Kazzak, who was initially located in the Blasted Lands, guarding the Dark Portal. Post-BC, he moved back through the portal where he hangs around the Throne of Kil’jaeden in northern Hellfire Peninsula. Doomwalker, meanwhile, is a fel reaver sent by Kil’jaeden to storm the gates of the Black Temple in Shadowmoon Valley. Kil’jaeden doesn’t really like being betrayed, see.
Getting to these bosses is fairly simple, though the likelihood of their being there isn’t very high. They’re incredibly easy to solo, really just tank-and-spanks, and thus are frequently killed by other players before you stand a chance of getting there. With their respawn timer being days, it can take a while to actually kill them. Luckily, as all their loot is BOE, you can sometimes find what you’re looking for on the auction house! There are a couple of nice weapons here, though nothing for enhance. One of the coolest staffs in the game, the Exodar Life-Staff, can be obtained as a drop off of Kazzak. This is the same staff that Prophet Velen wields, and makes for a stunning look for practically any caster. An identical staff can be obtained through a questline in Shadowmoon Valley if you’re unlucky and can’t find this one. Talon of the Tempest from Doomwalker is a jagged red dagger. And if you want to show off, Ethereum Nexus-Reaver from Doomwalker is one of the most visually-stunning two-handed axes in-game, with sweeping curves on its blades and a glowing head and pommel. Given its BOE status, though, I’d advise sending it to an alt that would normally wield two-handed axes in combat. Makes more sense really!
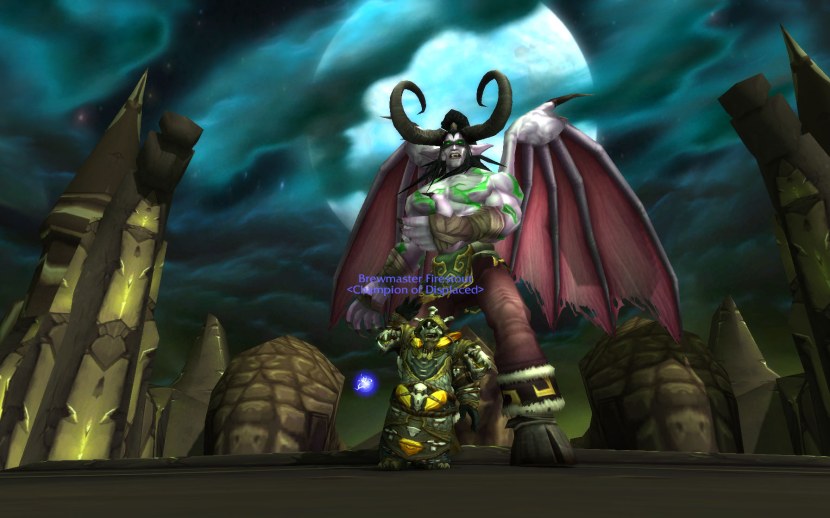
Karazhan
Karazhan is frequently on player’s lists of top raids in WoW, and for good reason! No other raid in WoW has captured its feeling of climbing through the last Guardian of Tirisfal’s forgotten, ghostly tower, almost like an inverse dungeon crawl. Karazhan also possesses the distinction of being the first 10-man raid in WoW’s history, an oddity just after two years of 20- and 40-mans. Kara was seen as the intro raid to BC, its 10-man requirements seen as much easier than needing to get 20 or 40 raiders together. Not only that, it was the only raid at launch not in Outland! Thematically, however, it fit, given that Medivh was the one who opened the Dark Portal to Outland in the first place.
Karazhan is one of three raids that makes up Tier 4, and is the largest of the three by far, with twelve bosses distributed amongst the [i]seventeen[/i] floors of the tower. Before patch 4.2, a lengthy attunement chain was required to obtain The Master’s Key. Only one person in a raid group needed to obtain it, but if you didn’t have it, you’d need to find someone who did. Said patch removed the key from the game, as well as the need to have it to get in. The quest chain is still in the game, and is great for lore buffs, reputation, or just something to do. You can start the chain from the NPCs in front of the tower.
To reach Karazhan, head to the Deadwind Pass in southern Eastern Kingdoms. The fastest way to get there is to go to the portal to the Dark Portal in any Azeroth capital city, then fly west. As you go over the mountains, you should see the tower of Karazhan in the southern end of the zone. Fly down to the gate, open it, and walk through.
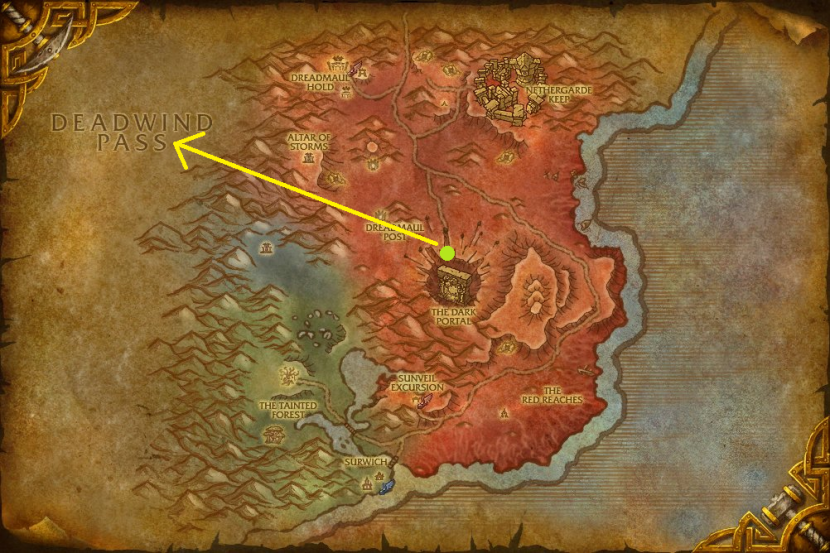
The green dot is where portals to the Dark Portal will take you. Follow the yellow arrow to the west-northwest to reach Karazhan.
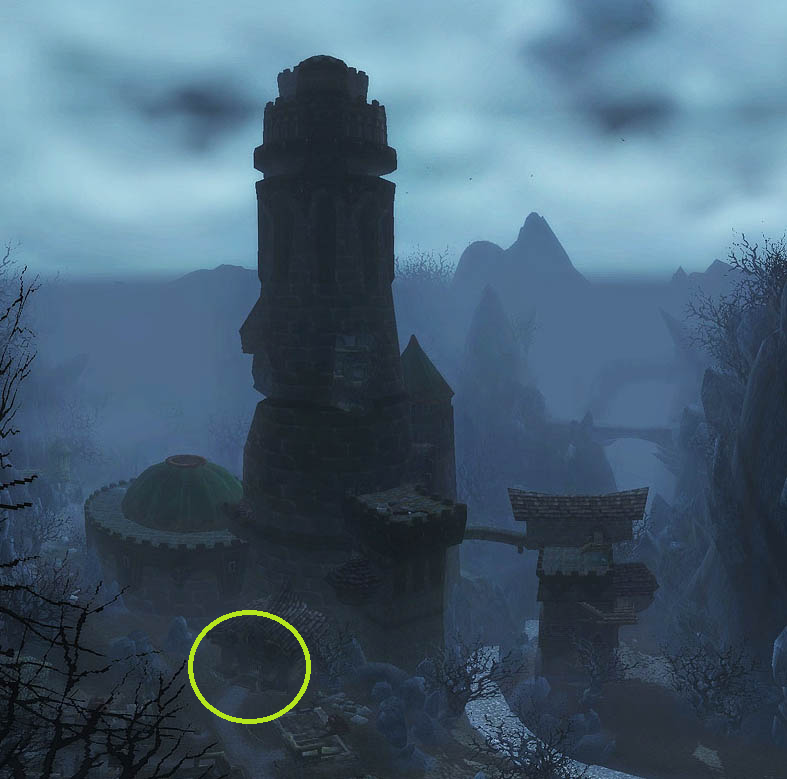
The entrance is in the green circle there.
Bosses
Karazhan has a whopping twelve bosses, though only four are necessary to reach Prince Malchezaar at the top. At level 90 (and even at level 85), no bosses really pose a threat. None has over a million health, even, so they’ll go down quick. I’ll list them all here anyway, with some notes on where they’re located and things to watch out for.
- Servant Quarters animal bosses: Not required to reach Malchezaar. From the instance portal, go through the first door on your right. You’ll end up in a series of dark rooms with one of three animal bosses: Rokad the Ravager (dog), Shadikith the Glider (bat), or Hyakiss the Lurker (spider). One random one will spawn every week. Behind them is a ramp to the third floor; you do not need to kill the animal boss to access it.
- Attumen the Huntsman: Not required to reach Malchezaar. From the instance portal, follow the big curving hallway to the left into the stables. Kill all the mobs before Midnight in the center, as they will all aggro onto you if you attack him. At 90 they likely won’t pose much threat, but better safe than sorry. Upon damaging Midnight below 95%, Attumen will spawn; upon getting either of them below 25%, Attumen will mount Midnight and attack. Be warned: I have had the fight bug out on me by killing one of them too quickly. Don’t go all-out until Attumen is mounted to be safe.
- Moroes: Required to reach Malchezaar. From the instance portal, take the stairwell to your right to the Grand Ballroom on the second floor. Go through the door into the dining hall to the left; Moroes will be in a recess on the far wall. He has four random adds with him, but nothing about the fight is difficult.
- Maiden of Virtue: Not required to reach Malchezaar. From Moroes, head back into the Grand Ballroom and take the stairs on the left wall up to the third floor. Take the door to your right into the Guest Quarters. Go to the right all the way to the circular room at the end of the hall. The Maiden has a silencing effect around her, but since this doesn’t affect Stormstrike or Lava Lash, she can be swiftly dealt with.
- Opera Event: Required to reach Malchezaar. From Moroes, head back into the Grand Ballroom and take the stairs on the left wall up to the third floor. Go straight into the Opera House, and continue going straight into the pit. Take the door to your left and follow the hallway until you see Barnes, the stage manager. Talk to him to start the event. A random opera will be chosen for you: the Big Bad Wolf, the Wizard of Oz, or Romulo and Julianne. All are swiftly dealt with, but note that in order to pass Romulo and Julianne, both need to die within a few seconds of each other in the third phase, else the alive one will resurrect the dead one and prolong the fight.
- Nightbane: Not required to reach Malchezaar. From the Opera Event, take the door that opens upon completion and follow the ramp to the second level; go all the way to the other side and take that ramp up to the third. Follow the hallway to the left, jump down, and continue straight into the Broken Stair. Rather than go up, take one of the doorways on this level to end up outside on the Master’s Terrace. Nightbane requires you to complete a quest chain to summon him, different from the one for the Master’s Key. This quest chain requires honored with the Violet Eye to start, and can be picked up from the NPCs outside the instance. Because he requires an extra attunement to access him, Nightbane is considered by some to be the true final boss of the instance, as opposed to Malchezaar. Regardless, once you’ve started the quest Nightbane (and from then on), you can summon Nightbane by clicking on the Blackened Urn on the terrace. Nightbane is simple at 90; he starts in a ground phase but will take to the air at 75%, 50%, and 25% health remaining. To deal with him quickly, activate Ascendance when you get him to 75%, then drain his health before he gets out of range. When he lands, he’ll keel over.
- The Curator: Required to reach Malchezaar. Follow the guide to get to Nightbane, only take the ramp up further into the Broken Stair. Follow the path up (it’s all very linear, even if it doesn’t look like it) until you reach The Menagerie; The Curator will be patrolling the hallway. The boss fight is trivial; if any of the mobs in the room start attacking you, Fire Nova them to death.
- Terestian Illhoof: Not required to reach Malchezaar. From The Curator, continue past into the Guardian’s Library, and climb up the massive ramp on the far side of the room. Avoid aggroing anything, as the wyrms are magic-immune. Continue through the circular room until you reach a hallway with ramps leading further up. The hallway will turn right, and then right again. At this second turn, before going right and up higher, look to the left at the bookcase. Click on it to open a secret passage; follow it to its end until you find Terestian. A very simple fight to burn him down; use him to spread Fire Novas to kill all the imps.
- Shade of Aran: Not required to reach Malchezaar, but recommended. From Terestian, go back out into the main hallway and continue up. The main hallway will continue straight, though there will be a branch off to the left very shortly. Take this branch and go through the door, and you’ll end up in a small, circular library room. Aran’s attacks won’t really hurt you, and all mechanics can be ignored. When Aran is killed, a teleport to his room will be unlocked; talk to Berthold the doorman just inside the entrance of the instance to be transported there. Very useful if you accidentally fall off the stairwell.
- Netherspite: Not required to reach Malchezaar. From the Shade of Aran, go back into the main hallway, and take a left to continue up. After another circular room, you’ll be presented with two ramps, one on the left that goes up, and one on the right that goes down. Take the left ramp up to reach the Celestial Watch, where Netherspite roams. The easiest way to kill him is to stand near the doorway and tag him with Unleash Elements when he gets close enough; quickly run back through the doorway into the hallway. Netherspite will follow you through the closed door; when he’s far enough through, run back to the doorway so you stand in between him and the beams. You’ll easily cut him off from all three and gain a bit of a power boost in the process. This is likely not really required with the damage a 90 can pump out; if you decide to do it in his room, stand in between him and the green beam so he won’t heal.
- Chess Event: Required to reach Malchezaar. From Netherspite, head back into the hallway and take the other ramp, then follow it until you reach the Gamesman’s Hall. A Consortium vendor is located just outside if you need to vendor things for bag space. The Chess Event is probably the hardest part of soloing the raid, for it’s not a boss, but a literal game of chess! This one will stop quite a few soloers in their tracks, mostly because they either don’t know how it works, or don’t know how to solo it. Luckily, there are some strategies you can use to make it easier.
The object of the chess event is to kill your opposing faction’s king (if you’re Alliance, you’re killing Blackhand; if you’re Horde, it’s Llane) while keeping your own alive, all in one big game of Warcraft chess. You can control one piece at a time, and each one has four abilities: two combat, one move, and one rotate. Each has a fairly long cooldown. You also have a ten-second wait between releasing one piece and controlling another. Medivh will control the other side and attempt to kill your king. In addition, he can cheat by spawning fire under some of your pieces, or giving a huge damage buff to some of his.
It’s been a long time since I’ve soloed chess (I’m writing the Karazhan part of this guide off of memory!), but one of the keys to doing it is to make sure your king has an exit if Medivh spawns fire under him. Your first move in any chess solo is to move the pawn in front of him forward a space, then resume playing as the king. The bishops (healers) will usually cast heals on you, though you may need to take control of them to be sure it goes where it needs to.
The basic strategy is to protect the king at all costs. When Medivh casts fire, move him out of it. Make the bishops heal him if they seem to not be. Enemy bishops should be targeted quickly if possible. If you play it right, you can even make Medivh’s king stand on a fire, taking out a major chunk of his health. To do this, stand out in the open and wait for the king to start attacking you. Then when Medivh cheats, step back a space, and his king will walk right into the fire! A lot of the event is luck, so don’t get discouraged! If you fail, restart and try again.
If you’re really having problems, you can make it easier by calling in a friend or two to help. If you have multiple people helping, make sure at least one is a bishop so you can have a reliable source of heals. And make sure that each one has a path out if Medivh cheats!
- Prince Malchezaar: The final boss of the instance, at least according to Blizzard, seeing as how his death is required for the Karazhan achievement. From the Chess Event, continue on into Medivh’s Chambers, which are rather interesting to explore; I’d recommend doing so at least once! To get to Malchezaar the fastest, simply go to the right upon exiting the Gamesman’s Hall and go up the stairwell to the top. A small room will separate you from Netherspace, where Malchezaar will be pacing around waiting for you. No, Malchezaar’s plans about Karazhan are not explained, nor what or where exactly Netherspace is. He’s just…there. At 90, he’s a cakewalk, so burn him quick (likely before he summons the legions he commands) and collect your loot and achievement.

Reputation
The reputation faction for Karazhan is the Violet Eye, a sect of the Kirin Tor who were initially sent to spy on Medivh in Karazhan. Though Medivh is long dead and even atoned for some of his sins through his actions in Warcraft 3, the Violet Eye remains in Deadwind Pass to continue observing the evils within. Reputation is gained through killing mobs and bosses in Karazhan proper, as well as the Master’s Key and Nightbane questlines. Non-elite mobs give 2 rep, elites give 15 rep, and bosses give 250 rep. In total, expect to take a couple months to hit exalted, even with both questlines and a lot of trash killing.
Similar to the Brood of Nozdormu from Classic, the Violet Eye rewards players for hitting various reputation levels with an upgradable ring: one for melee/physical DPS, one for casters, one for healers, and one for tanks. Each reputation level from friendly to exalted will reward a new version of the ring; it can be retrieved at any time if deleted, and can be swapped for any other at exalted. In addition, various recipes for jewelcrafting, leatherworking, enchanting, and blacksmithing can be obtained at different reputation levels from honored to exalted; these can be purchased from the quartermaster just outside the portal to Karazhan. There used to be an alchemy recipe for a Flask of Chromatic Wonder, but with the removal of spell resistances in Mists, the recipe has been removed from the game.
Notable Loot
Karazhan only has one special crafting material, that being Soul Essence. Soul Essence has a moderate to high droprate off of basically every ghost mob in the raid. Eight of these can be combined by tailors with one Bolt of Netherweave to produce a Bolt of Soulcloth. This cloth is only used in a set of tailoring and leatherworking recipes related to the raid. Leatherworkers can craft a leather chestpiece and a cape (patterns purchased from the Violet Eye), while tailors can craft the Soulcloth Embrace, a three-piece arcane resistance set of chest, shoulders, and gloves. The glove pattern can be bought from a Mag’har or Kurenai vendor in Nagrand, while the other patterns are trash drops from the raid.
Karazhan is also the place to go to start your collection of our Tier 4 set, the Cyclone Harness. Tier 4 was the first five-piece tier in WoW, meant to alleviate the pressures of collecting a full eight-piece set just to get all your tier bonuses. Tier 4 was also the introduction of different sets for different specs. Before BC, shaman tier bonuses revolved almost exclusively around healing; enhance or elemental were pretty much left out in the cold (enhance even more than ele, having no bonuses for them whatsoever), making it so that few shaman ever raided as anything other than resto. Starting with Tier 4, and with every tier afterwards, a set was created for each spec with differing needs. In the case of shaman, enhance has a Harness, elemental has Regalia, and resto has a Raiment. They all look the same, but if you want a specifically enhance set, go for the Harness.
Kara has two bosses that drop tokens for the set. These bosses drop one of three tokens for that slot, each shared amongst three classes. For shaman, look for the Fallen Champion tokens. In addition, matching off-set pieces can be found off of three other bosses in the raid. Drop locations are:
- Gloves: The Curator
- Helm: Prince Malchezaar
- Bracers (Whirlwind Bracers): Attumen the Huntsman
- Belt (Belt of Gale Force): Moroes
- Boots (Ferocious Swift-Kickers): Nightbane
On an additional note, if you haven’t completed the quest to summon Nightbane yet, but you want the boots, you can get them from Gruul’s Lair as well. More details on that when I get there.
Being a twelve-boss raid, Karazhan has a boatload of various transmog opportunities for any class, enhancement shaman included. There’s a bevy of weapons here to transmog, so I’ll go through each enhance category in turn:
- One-handed Axes: The Decapitator off of Prince Malchezaar makes for a very frosty look; while it matches fine with T4, I’d consider pairing it with Sanctified T10.
- One-handed Maces: Fool’s Bane from Terestian Illhoof is a big, fiery-orange mace that just looks great no matter what. Shard of the Virtuous from the Maiden of Virtue and Light’s Justice from Prince Malchezaar are both currently main-hand weapons and unsuitable for enhance transmog; however, 5.2 will turn these into one-handed maces, so farm them up if you’d like them. Shard of the Virtuous is a big crystalline mace, while Light’s Justice is a smaller, noble golden weapon.
- Fist Weapons: Big Bad Wolf’s Paw from the Big Bad Wolf in the Opera Event. It’s the same model and look as Eskhandar’s Claws from MC.
As for other weapons we can wield, but aren’t used as enhance:
- Daggers: Emerald Ripper off of Moroes is a jagged, sinister green dagger. Blade of the Unrequited from Romulo and Julianne in the Opera Event is a more subtle dagger with a spinning motion effect in the pommel. Nathrezim Mindblade and Malchazeen off of Prince Malchezaar are two daggers that both look equally demonic and deadly.
- Staffs: Nightstaff of the Everliving from Nightbane makes for a good staff if you’re going for a Twilight’s Hammer look. Staff of Infinite Mysteries off The Curator is a jagged purple-and-black staff that (if memory serves) hides enchant effects with its own purple glow; consider it if you have a purple transmog set and hate seeing enchants on your weapon! Terestian’s Stranglestaff off of (duh) Terestian Illhoof is…well, it’s a green, wriggling octopus on a stick. What more could you ask for?
- Shields: Dragonheart Flameshield and Shield of Impenetrable Darkness, both off of Nightbane, are worlds apart in design. The Flameshield has a draconic crest that occasionally spits out a jet of fire, while the Shield of Impenetrable Darkness is a muted, silvery-black shield with a unique shape. The Triptych Shield of the Ancients, from the Chess Event, is a round gold-and-silver shield with three sections jutting out from around the center. A unique look if you can find a gold set to go with it!
- Off-Hands: Most of these are pretty meh, so I’ll list them quickly: Signet of Unshakable Faith, Moroes; Aran’s Soothing Sapphire, Shade of Aran; and Jewel of Infinite Possibilities, Netherspite. Of particular note is the Talisman of Nightbane, off of (duh) Nightbane. Similar to the Dragonheart Flameshield, the Talisman is basically a fiery-orange dragon head on a stick, and it too breathes fire!
- Two-handed Axes and Maces: Just for when you want to show off! Legacy from the Crone in the Wizard of Oz Opera Event is a crystalline axe of draenei make, so I’d consider farming it up if you play one! The true showoff prize from Karazhan is Gorehowl, Grom Hellscream’s legendary axe, available as a drop from Prince Malchezaar. I really wish there was some sort of Easter egg if you wielded this in front of Garrosh.
If you’re on the hunt for a rare mount, look no further than the Fiery Warhorse’s Reins, a low drop off of Attumen the Huntsman. Yes, your very own copy of Midnight, available for you to ride around on! If he looks familiar to those who have been lucky enough to get the Horseman’s Reins during Hallow’s End, it shouldn’t be a surprise: Both mounts are incredibly similar, with the Horseman’s Reins being essentially a reskin/model of the Fiery Warhorse. However, there are a few important things to note:
- The Fiery Warhorse has hooves that are on fire. More than that, the hooves are so amazing the legs don’t even attach to them.
- The Fiery Warhorse has fangs. That’s right, this horse is a VAMPIRE HORSE. ON FIRE.
- The Fiery Warhorse also has a horn. So for those keeping score at home, this mount is a VAMPIRE UNICORN. ON FIRE.
- In addition to all this, the Fiery Warhorse also has an assortment of things that makes it cooler than the Horseman’s Reins. Namely, more armor, blood-red trim, and skulls hanging off the sides. So in short, this mount is a TOTALLY BADASS VAMPIRE UNICORN ON FIRE.
The only thing the Horseman’s Reins has over the Fiery Warhorse is that it can fly. Little does it know that the Fiery Warhorse can fly, but practices restraint and chooses not to. For if it could, it would create an explosion of sheer awesome that would wipe out existence entirely.
Yes, it’s that cool.
FEAR ME
Finally, there is an assortment of profession recipes available as both trash and boss drops. For engineers, Attumen the Huntsman drops the schematic for the Stabilized Eternium Scope. Enchanters can get an assortment of formulas: Weapon – Mongoose off of Moroes, Weapon – Soulfrost from Terestian Illhoof, Weapon – Sunfire from the Shade of Aran, and Boots – Surefooted from Phantom Stagehands, located behind the Opera stage. All of these are apparently guaranteed drops for enchanters. Lastly, as mentioned earlier, tailors can get two of the three patterns for the Soulcloth Embrace off of trash in Karazhan. The shoulder pattern can be obtained from Phantom Attendants, and the chest pattern is a drop off of Phantom Valets. Both these mobs can be found in and around the Grand Ballroom; none are located beyond the entrance to the Opera.

Magtheridon’s Lair
The second of the Tier 4 raids, Magtheridon’s Lair is a short, one-boss affair. The Illidari forces of Hellfire Peninsula have imprisoned the pit lord Magtheridon beneath Hellfire Citadel, using his blood to fuel the creation of an army of fel orcs, and it’s up to you to kill him to thwart their plans.
Magtheridon’s Lair is the first 25-man raid in WoW, released at the beginning of BC with patch 2.0. After the death of 40-man raiding with the launch of BC, the 25-man raid size was maintained as “the” raid size throughout BC, despite the existence of two 10-mans. This was mostly due to the fact that one 10-man was the “intro” raid, while another was seen as a catch-up raid. Even in Wrath, where every raid had a 10- and 25-man equivalent, 25-mans were viewed as the only legitimate raid size. When it came to the world-first race, nobody cared about anything but 25s. It took Cata’s gear and difficulty normalizations to put 10-mans on equal footing, though there are plenty today who still maintain that 25s are where true raiders raid.
Enough splitting hairs, on to the dungeon!
To get to Magtheridon’s Lair, get to Hellfire Peninsula. You can either fly northeast from Shattrath, or fly west from the Dark Portal. Once there, fly around to the southeastern side of Hellfire Citadel, and enter the raid portal on the back wall. If you’re up top and you see purple portals, you’re in the wrong place.
Fly down past the left side of the central tower.
The portal is in this tunnel here.
Bosses
Magtheridon’s Lair has only one boss, Magtheridon himself. Before you begin, kill the four Hellfire Warder packs scattered around the pit lord’s chamber. There will be one at the top of the ramps leading down, one halfway down each ramp, and a fourth patrolling the bottom part of the dungeon. Starting the encounter will aggro these packs onto you, which isn’t that big a deal save their fears. Why deal with the headaches when they can be killed quickly?
- Magtheridon: A simple fight. At the start, five Hellfire Channelers will be (naturally) channeling a spell onto Magtheridon. Kill them quickly, and interrupt Dark Mending when you can. They can summon infernals, but these also die quick. Once they’re all dead (or after two minutes, but you should be able to kill them all before then), Magtheridon will activate. At this point, it’s basically a tank and spank. None of his attacks do enough to pose a threat, not even when he collapses the ceiling. The collapse will knock you around a bit, but won’t stop you.

Notable Loot
None of the trash in the instance drops anything at all, so Magtheridon is the only source of loot in the dungeon.
Being a Tier 4 raid, Magtheridon drops the Tier 4 chest token, but since this is a 25-man raid, he drops three of them, tripling your chances of getting the one you want. Again, you’re looking for Fallen Champion.
- Chest: Magtheridon
As for weapons…well, there’s literally no weapon transmog options for enhance. There are a few options if you’re looking for elemental or resto transmog, though:
- Staffs: Crystalheart Pulse Staff, a pinkish-red glowing crystalline staff. Hard to tell if there’s any armor that would match this well, but hey, it looks pretty!
- Shields: Aegis of the Vindicator, a pink-and-red crystalline shield, looking similar to shields some draenei carry. Perhaps a good transmog option for draenei shaman!
- Off-hands: Karaborian Talisman, a simple draenei-inspired off-hand with floating crystals. Another good choice for draenei shaman.
As for 100% drops, Magtheridon drops his head, which can be turned in at your respective faction’s city in Hellfire (Thrallmar for Horde, Honor Hold for Alliance) for a ring. Doing so will also enable a zone-wide buff increasing Thrallmar rep gained through kills by 10% for two hours. He also drops the Pit Lord’s Satchel, a unique 20-slot bag. An easy bag to get if you still have something to upgrade. Finally, he drops the Black Sack of Gems, containing a few rare- and epic-quality BC uncut gems.

Gruul’s Lair
The final raid of Tier 4, Gruul’s Lair is a 25-man raid released with the rest with patch 2.0. The story behind the raid is fairly simple. Deathwing left behind some black dragons in Outland, figuring nothing would pose a threat to them. Unfortunately, he failed to account for the gronn of Blade’s Edge Mountains. Led by Gruul, the gronn killed and impaled the black dragons on the spires of Blade’s Edge. Seeing as how a being that can kill dragons with his bare hands would not be fun to run into, it’s up to you to put Gruul the Dragonkiller down.
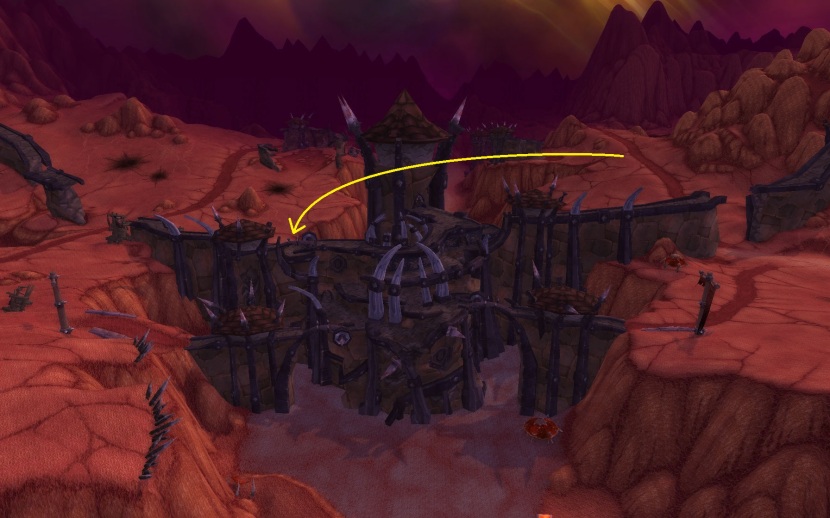
To get to Gruul’s Lair, travel to the northeastern end of Blade’s Edge Mountains. You can take a flight path up to Evergrove to put you close to the location of the lair. Once you’re up there, fly into the valley between the Bash’ir Landing and Evergrove, and go to the eastern end. Gruul’s Lair’s entrance will be in a cave in the bottom.
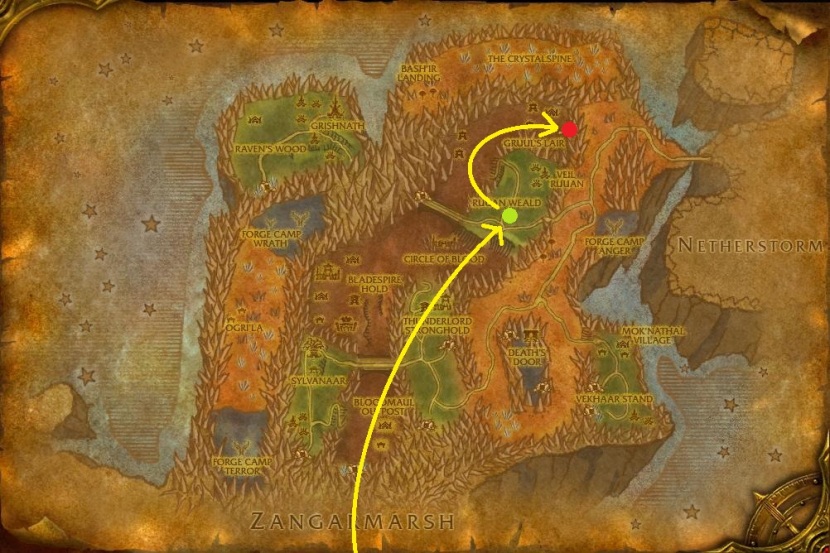
If you fly to Evergrove, you’ll arrive at the green dot. Fly to the red dot in the valley to make it to Gruul’s Lair.
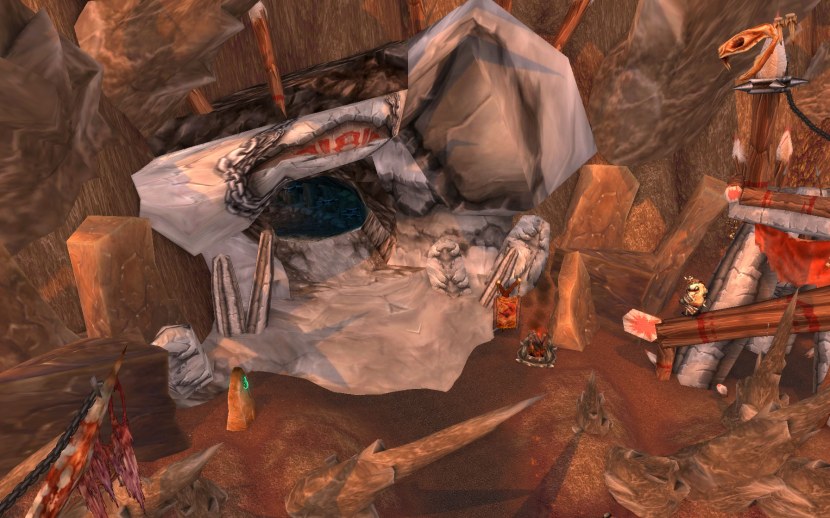
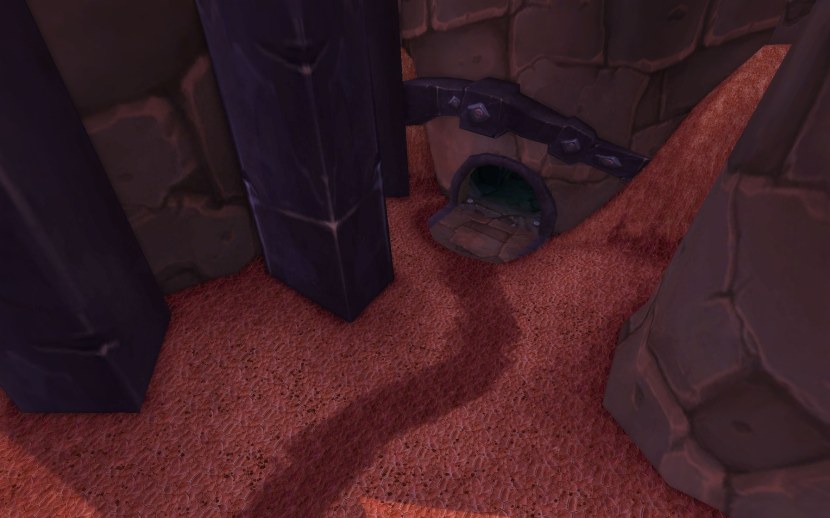
Gruul’s Lair is in this cave.
Bosses
Gruul’s Lair has two bosses, making it the second-smallest raid in BC. There are very few trash mobs to deal with, and the raid itself is basically linear.
- High King Maulgar: A council fight with one main and four sub-bosses. Maulgar is the primary boss here, with four advisors: Kiggler the Crazed (shaman, though he has a lot of mage abilities), Blindeye the Seer (priest), Olm the Summoner (warlock), and Krosh Firehand (mage). Of these four, Kiggler should be your first priority, as he can polymorph you. Next, burn down Olm, as he’s the only other disorienting mob (besides Maulgar himself). Blindeye will probably not get too many heals out to be a problem, but regardless, he should be your next target. Finish off Krosh, then burn down Maulgar. Use your Tremor Totem the first time you need to, and be sure to have wolves out when you can, as their heals will keep the damage from getting too severe. Healing totems and damage reductions will help as well.
- Gruul the Dragonkiller: Tank and spank. He’s a simple burn, and his self-buff won’t get high enough to pose a threat, nor will any of his attacks. If you can get past Maulgar, Gruul will be a cakewalk.

Notable Loot
Both bosses in Gruul’s Lair drop Tier 4 tokens, three apiece. Chances are fairly good you’ll manage to get the Fallen Champion tokens you want. Gruul can also drop off-set matching boots, useful if you haven’t unlocked Nightbane in Karazhan yet. Drop locations are:
- Shoulders: High King Maulgar
- Legs: Gruul the Dragonkiller
- Boots (Windshear Boots): Gruul the Dragonkiller
So, summarized, here’s where to get T4:
- Helm: Prince Malchezaar, Karazhan
- Shoulders: High King Maulgar, Gruul’s Lair
- Chest: Magtheridon, Magtheridon’s Lair
- Gloves: The Curator, Karazhan
- Legs: Gruul the Dragonkiller, Gruul’s Lair
- Bracers: Attumen the Huntsman (Whirlwind Bracers)
- Belt: Moroes (Belt of Gale Force)
- Boots: Nightbane (Ferocious Swift-Kickers), Gruul the Dragonkiller (Windshear Boots)
Being a two-boss raid, Gruul’s Lair doesn’t give much loot, and sadly there is nothing really for enhance transmog here (unless you’d like a red recolor of the Dragonstalker Helm). Some other things to look out for:
- Shield: Aldori Legacy Defender off of Gruul is basically the draenei crest in shield form. I can’t think of a better shield for those shaman who want to represent draenei pride. Plus it’s glowy, so who can argue with that?
- Two-handed Axes and Maces: Again, for showing off only! Axe of the Gronn Lords from Gruul is a brutal two-handed axe seemingly made of a sharpened boulder on a stick. If you want something that looks primal, go with this. Hammer of the Naaru from High King Maulgar is a two-handed mace of draenei origin; it’s the same hammer that the draenei paladin was wielding in the BC cinematic!
There are no other real drops of note in the raid. It’s a small one with not many reasons to go to it, except T4.
Serpentshrine Cavern
Serpentshrine Cavern (SSC for short) is one of the two raids that make up Tier 5, and was released in patch 2.0. The launch of BC was unique in that it offered up not just one, but two full raid tiers at launch. No expansion since has done this, and for good reason; in retrospect, Blizzard admitted that this led to a severe lack of content later in the expansion, which I’ll get into more when we get up to Tier 6.
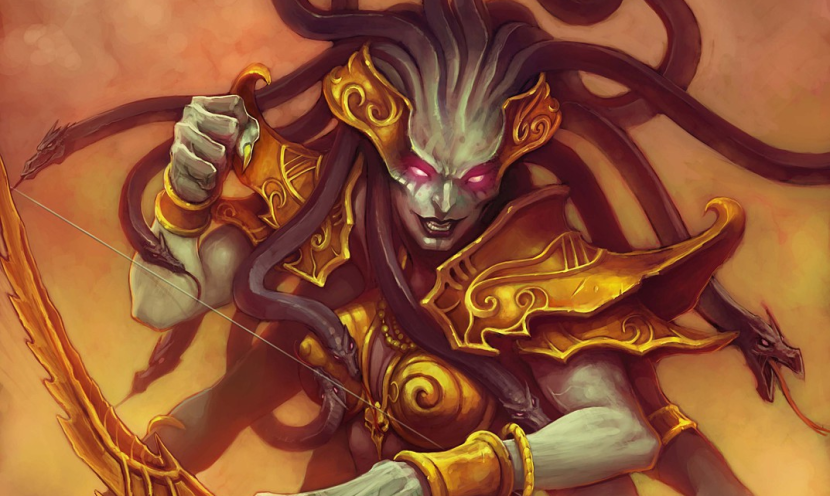
Tier 5 was all about defeating Illidan’s top two lieutenants, and in SSC, that meant taking on Lady Vashj, ruler of the naga forces in Outland. Water is in short supply in Outland, at least outside of Zangarmarsh. And whoever controls the water controls Outland. Makes sense, though for the life of me I can’t remember if it was brought up during Zangarmarsh questing. It probably was, but let’s face it, most of us don’t really pay attention to Outland stories anymore. Anywho, your job is to go into SSC and take Vashj out; with Vashj defeated, the naga threat will diminish.
SSC used to have an attunement involving killing Gruul and Nightbane (hence why some claim Nightbane is the true endboss of Kara, since Malchezaar’s death didn’t lead to another raid unlocking). Completing the attunement quests for T5 rewarded players with the title “<name>, Champion of the Naaru”. The attunement requirement was removed in a hotfix in patch 2.1, but the quests remained in game. The title reward was removed at the start of Wrath of the Lich King, though those who obtained the quests pre-Wrath could still complete them for the reward. The quests themselves are still in the game, but the SSC quests require a player to be level 70 to pick them up. The two-quest chain starts and ends with Skar’this the Heretic, an NPC in heroic Slave Pens; if you want to complete it, turn off XP when you hit 70, then either queue for it (I have no idea what the queue times are like for BC heroics) or get a high-level friend to run you down there. From there, you’ll need to be run through Kara until you have enough rep to do the Nightbane chain (that’s a long one), then kill Nightbane, then kill Gruul. I have no idea how difficult this is! I should do it sometime.
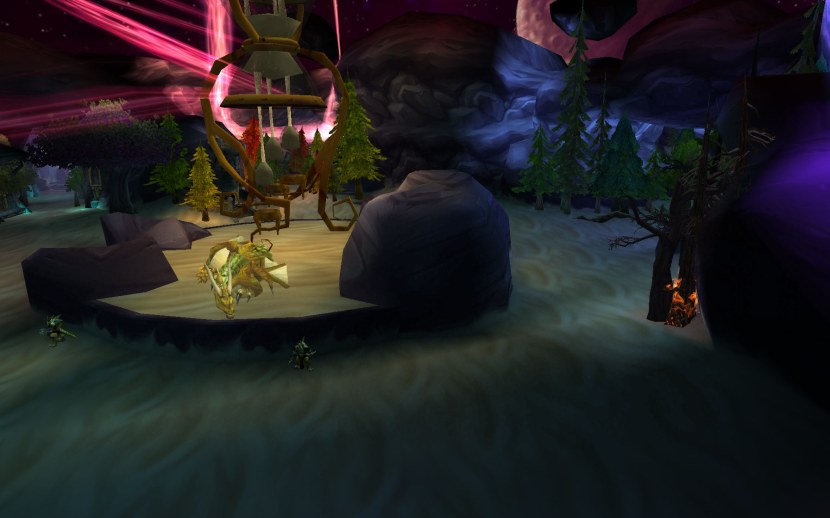
For those of you who just want to get to SSC, head to the Coilfang Reservoir in northern Zangarmarsh; it’s a short flight northwest from Shattrath. You’ll then need to swim down the center of the structure in the middle of the reservoir, into the tube, all the way until you get to an open-air chamber (use Water Walking to make the last leg of the journey a little quicker). SSC’s portal will be straight ahead of you.
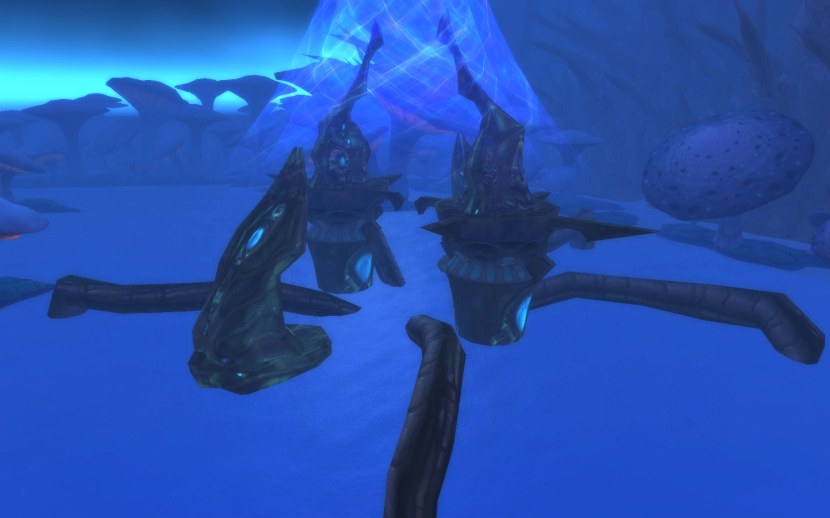
The structure itself is fairly hard to miss. Fly into its center and underwater.
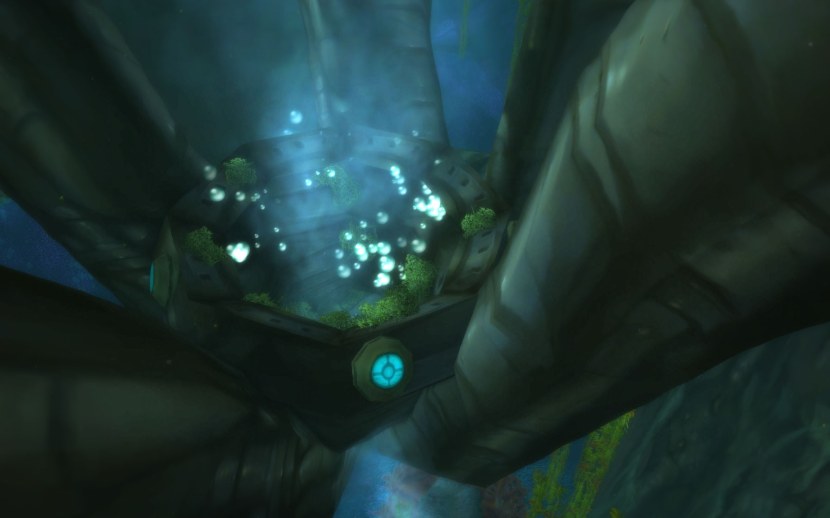
This is the pipe you’ll see upon swimming under the surface. Swim into it and along its length.
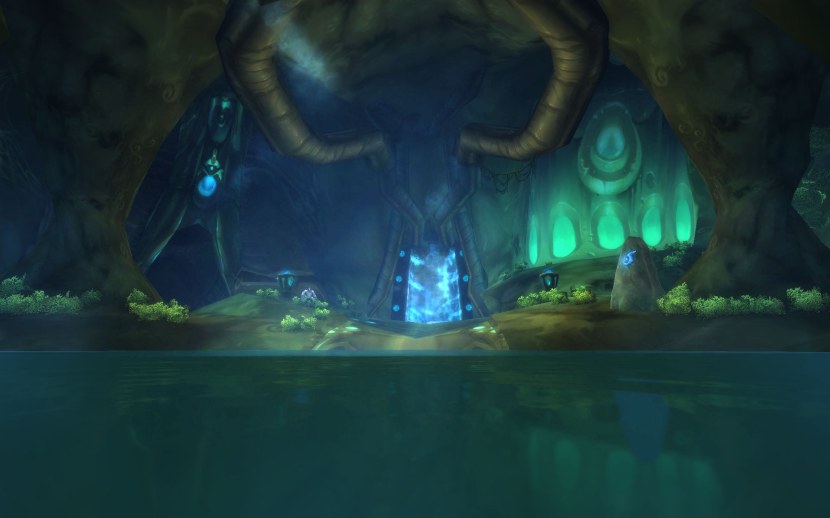
Upon exiting the pipe, the portal is directly ahead of you and through the falling water.
Bosses
I actually have more than one or two bosses to talk about! Hooray!
Serpentshrine Cavern has a total of six bosses scattered throughout its (very large) chambers. They can be tackled in any order, including Vashj! This made SSC runs before the rise of transmog kind of annoying, as most players only wanted to kill Vashj to get their achievement. Made finishing T5 a difficulty for me back in Wrath. Today, however, players are more open to completing extra bosses, rather than running straight to the end. Luckily for you, you don’t have to worry about other players!
- Hydross the Unstable: Tank and spank. All mechanics can be safely ignored.
- The Lurker Below: This is somewhat of a hidden boss, except for the fact that his spawn point is marked by a big skull on the map. The Lurker is a unique boss in that he requires you to fish him up. You no longer need a fishing pole to use fishing, but (according to Wowpedia, may be out of date) you do need to have at least 300 fishing in order to spawn him. Head to the wooden platform in the center of the lake surrounding a Strange Pool. Fish in this pool to bring him up. It may take quite a few attempts (I went in recently and I think it took about 15-20 tries), but when you’re successful, The Lurker Below will spawn. The fight itself is tank and spank. He will frequently knock you back, and this will likely push you into the water; jump back onto the platform and keep at it. When he uses Spout, keep moving around him in the direction he turns and don’t get hit by it; you won’t be damaged too much, but you will get knocked back a considerable distance.
- Leotheras the Blind: Tank and spank. The fastest way to get to him is to take the western door on the back wall; follow the tunnel until you enter a larger chamber. You’ll see him in a corner surrounded by Greyheart Spellbinders; kill them to start the fight. His mechanics do not do enough damage to have an effect, and I managed to kill him when he went into his demon phase. If he does, focus on Leotheras, as killing him will end the encounter and despawn the demon.
- Fathom-Lord Karathress: Hoo boy. Karathress is by far the hardest fight to solo, but with the right tactic you can make this work. This is going to be a long explanation, so bear with me!
Karathress is so hard because of his Cataclysmic Bolt ability, an attack that hits for 50% of your MAXIMUM health. Two hits of this with no healing will mean swift death. In addition, Karathress has three lieutenants, a priest (Caribdis), a hunter (Sharkkis), and a shaman (Tidalvess). Each has its own set of abilities, and when killed, Karathress gains one of them.
Caribdis, in addition to healing, has a cyclone ability that will prove to lock you out of doing anything if you get sucked in. She can also cast Tidal Surge, which knocks you up and ice blocks you for a few seconds, killer if you’re low on health and it’s time for another Cataclysmic Bolt. Karathress gains Tidal Surge when Caribdis is killed. Sharkkis has barely any attacks to worry about, save The Beast Within. This ability is granted to Karathress when Sharkkis dies, allowing him to buff his damage by 30%. Since Cataclysmic Bolt already hits for half your health, an additional 30% isn’t going to help you at all. Tidalvess has no real attacks of note; when killed, Karathress gains Spitfire Totem, which is basically a Searing Totem.
You can’t start off by burning Karathress because he’ll gain a buff called Blessing of the Tides from every lieutenant still alive when he gets damaged enough (somewhere between 75 and 90%, I’m unclear). This buff, stacking up to three times (for three lieutenants), buffs his damage and reduces time between his attacks by 65% per stack. Even one stack of this buff is deadly, turning Cataclysmic bolt from a 50% hit to an 82.5% hit! Two stacks will one-shot you without damage reducing cooldowns, and three…let’s just say you won’t make it. In theory, if you could burn Karathress before he casts Cataclysmic Bolt once, you could manage to cheat the fight somewhat; however, this would require you to do about 160k burst DPS for ten seconds, not yet manageable in current raid gear.
The best kill order is Caribdis -> Tidalvess -> Sharkkis -> Karathress. The strategy I finally found to work was to go all-out burst at the start (Fire Elemental, Ascendance, Stormlash) and burn Caribdis before she can cast a single cyclone. Next, swap to Tidalvess and burn him down while you still have most of your burst going. Leave Sharkkis for last so Karathress doesn’t get that 30% damage buff until the last possible second, then pop wolves and finish off Karathress. Use damage reductions like Shamanistic Rage and Astral Shift to negate a chunk of Cataclysmic Bolt, and use Healing Tide Totem to keep yourself from getting too low. Once the lieutenants are dead (and assuming he never got a stack of Blessing of the Tides), Karathress himself is a cakewalk. The freeze ability will annoy you a bit, but everything else is easy to handle.
For my non-shaman readers, note that Karathress only casts Cataclysmic Bolt on mana-using classes, for no reason other than to aggravate future soloers, I guess. If you don’t use mana (or have a spec that doesn’t), congrats! Karathress is basically a tank-and-spank for you. I’d still suggest the kill order above, because Caribdis is still annoying as hell.
- Morogrim Tidewalker: Tank and spank. Tidal Wave will slow your kill down, but won’t stop it. Everything else is a cakewalk. Use murlocs for bonus damage with Fire Nova.
- Lady Vashj: Ever since the change to Tainted Cores that made them no longer root their carriers, Vashj has been (technically) soloable. In Mists, Vashj is soloable by enhancement shaman, but can still be a challenge if you’re unprepared. I would HIGHLY recommend downloading the BC Deadly Boss Mods to help with the timing in phase 2.
In phase 1, the only abilities to worry about are Entangle (a root) and Shock Blast (a stun). These will only be annoying, but they can come back to haunt you in phase 3. At the start, burn her down normally, and keep your health topped off while heals are still easy.
When she goes invulnerable at 70%, the waiting game of phase 2 begins. Kill as many water elementals as you can to keep her stacks down for as long as possible; even if you kill a bunch, she’ll very likely end up with at least 80 towards the end of the phase anyway. Still, keeping her stacks down will mean less damage to heal through during the earlier parts of the phase. Use Healing Stream Totem to keep your health from falling too low; its low cost will help conserve mana, while still providing about as much healing over its lifespan as a Healing Surge. Naga, striders, and Tainted Elementals will spawn in at set intervals. Naga are easy to DPS down and won’t pose a threat. They also allow you to gain some Maelstrom stacks. Striders will fear you, so use Tremor Totem to get out; if you have Totemic Restoration, recall it quickly so it’ll be up for the next strider. Tainted Elementals should be /targeted whenever they spawn and killed immediately, as another will only spawn when the current one is killed. If you’re having trouble finding them, look for their green attacks, which arc very high into the air towards you. Sometimes they’ll despawn and respawn elsewhere. Once you kill them, loot their bodies to get the Tainted Core, then run to one of Vashj’s four shield generators and interact with it to power it down. Repeat three more times to get to phase 3.
Before you start phase 3 (when you have the last core), heal up with Healing Tide and/or some Maelstrom heals, then run in and start the final phase. Naga and striders will continue to spawn during phase 3, so be aware of the possibility of getting feared. Pop wolves and other damage cooldowns and burn her down. She’ll use all her abilities from phase 1, just that they do a lot more damage thanks to her high stacks (again, there’s just too much going on for you to keep her stacks down to a reasonable level). Use damage reduction cooldowns to help keep your health up, and burn her down the rest of the way. It may take a couple attempts to really know what you’re doing, but it is possible!

Reputation
SSC does not have an associated reputation, though before patch 4.3 it did allow an indirect method of grinding a dungeon rep. The Cenarion Expedition is the primary reputation faction for Zangarmarsh, and is also the primary rep for the dungeons of Coilfang Reservoir. While reputation is easiest to gain by running the various dungeons, there used to be another method. Mobs in these instances and SSC could drop Coilfang Armaments, which could be turned in to a Cenarion NPC for reputation. However, for some reason or another, the ability to turn these in was removed in patch 4.3, even from those who did the prerequisite quest to unlock the repeatable quest. Possibly, Blizzard didn’t want players to be able to buy their way to an exalted rep, as armaments could be freely traded. Thus, the only easy way to gain rep now is to grind out kills in the Coilfang dungeons, and there is now no way to gain any reputation through SSC.
Notable Loot
SSC has one crafting material of note, Nether Vortex. This has a low chance to drop off of any mob, and two are a guaranteed drop off of Vashj. Nether Vortexes can also be purchased for 78 Justice Points from G’eras in Shattrath. Nether Vortexes are used in a variety of professions for various purposes. Tailors, leatherworkers, and blacksmiths can use them in the creation of belts that match T5 sets, learned from patterns dropped in SSC. Blacksmiths could also, before Cataclysm, use them to upgrade weapons and armor learned through the various blacksmithing specializations into their final, strongest forms; weapons like the Lionheart Executioner, and armor like the Bulwark of Ancient Kings. Finally, alchemists could use them to upgrade their Alchemist Stone from a generalized trinket to a stronger one more suitable for a specific combat role, provided they were exalted with the Shattered Sun Offensive and had learned the formulas. More on that later!
All trash mobs also have a chance (fairly good) to drop Marks of the Illidari. These can be turned in to Aldor or Scryers vendors in Shattrath for flasks usable in Tier 5 and 6 raids. As these flasks are fairly weak, Marks are pretty much useless.
SSC, being a Tier 5 raid, naturally has some of our Tier 5 armor set: the Cataclysm Harness. This set, a fiery red with moving shoulders and a molten flame covering the visor, is one of the more visually striking tier sets for shaman, especially when paired with a particular fist weapon set we’ll get to later. Three pieces are available from SSC, as well as an offset piece. Drop locations are:
- Gloves: Leotheras the Blind
- Legs: Fathom-Lord Karathress
- Helm: Lady Vashj
- Boots (Tempest-Strider Boots): The Lurker Below
In addition, one of the leatherworking patterns from SSC, Hurricane Boots, matches T5 as well. The boots are BOP, but the pattern itself is BOE, so you can probably find it on your auction house.
Sadly, SSC is pretty awful for good enhance drops. If broadened to include elemental and resto, it’s a little better, but there’s just not a lot of good loot here. Still, here’s what you can find for enhance:
- One-handed Maces: Mallet of the Tides from The Lurker Below is a green, spiky affair, almost organic-looking in a way. Lightfathom Scepter from Lady Vashj is of a similar design, but more symmetrical.
For non-enhance specs:
- Daggers: Fang of Vashj from (of course) Lady Vashj is a small, subdued green dagger.
- Staffs: Wildfury Greatstaff, a trash drop, is a green, leafy staff that would probably look better on a druid. Given shamans’ ties to nature, though, I think it’d still be fitting.
- Off-Hands: Fathomstone from Hydross the Unstable is a fairly basic blue floaty crystal off-hand like you see a million times in BC.
- Two-handed Maces: World Breaker off of Fathom-Lord Karathress is a big, brutal mace, complete with spikes of all manner of sizes and a sinister red glow. A good weapon to show off with, especially given how tough the boss to defeat to get it is!
Finally, trash and bosses can drop an assortment of leatherworking, tailoring, and blacksmithing patterns and plans, starting a trend that has continued through nearly every raid tier since. For T5, these patterns are for boots and belts. The boot patterns are BOE, while the boots are BOP; conversely, the belt patterns are BOP, while the belts themselves are BOE. In most cases, these belts and boots match various T5 sets, so they can sometimes provide an alternative to farming up troublesome drops.
On a final note, thanks to the Mists engineering tinker Goblin Glider, you can actually fly to just about anywhere in the raid from the elevator shaft. Simply jump down as the elevator is going down, then activate the glider just as the wall opens up into the raid. Not only will this let you bypass both (annoying) elevators, but it will also allow you to shorten the time it takes to get anywhere you need to, skipping a lot of trash along the way!
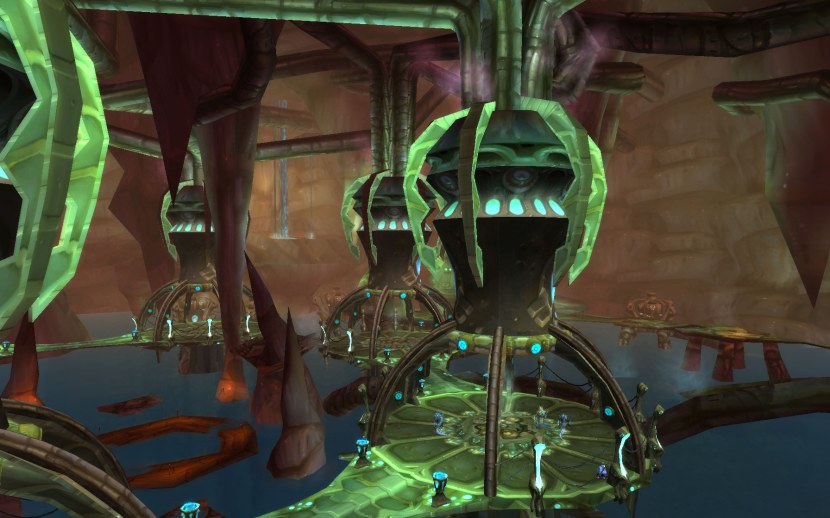
Also allows you to take some pretty neat screenshots.
Tempest Keep
Tempest Keep is the other raid in Tier 5, released with all the rest of the raids I’ve covered so far in patch 2.0. If we’re being technical, Tempest Keep refers to the various naaru-themed dungeons in Netherstorm, and the raid zone I’m discussing here is actually called The Eye. However, most players just call it Tempest Keep since it’s labeled that way on the map, and even the achievement for TK refers to the raid as Tempest Keep.
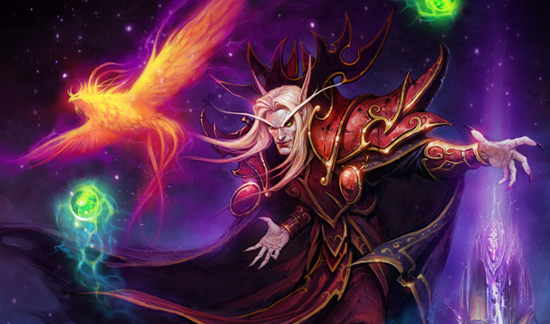
Illidan’s other major lieutenant was Kael’thas Sunstrider, prince of the blood elves and the leader of their contingent in Outland. While initially under the guise of working to save his people from their magic addiction after the Sunwell was destroyed during Warcraft III, Kael’thas was a man who worked for his own ends alone. To that effect, he left the employ of Illidan and worked for who he saw to be more powerful, the Burning Legion. His experiments into absorbing the powers of Netherstorm tore the already-crumbling region further apart, and it’s up to you to put an end to him before he inadvertently destroys all of Outland!
Like SSC, TK originally had an attunement, and completing both would reward the Champion of the Naaru title. TK’s attunement was available after the Cipher of Damnation questline in Shadowmoon Valley. It involved heroic runs of Shattered Halls, the Steamvault, Shadow Labyrinth, and the Arcatraz, followed by a kill of Magtheridon. While that alone sounds simple, it wasn’t merely four dungeons and a raid! No, you first had to complete questlines to unlock Shattered Halls and the Arcatraz, the former involving taking down a Fel Reaver that wandered Hellfire Peninsula, the latter involving runs of both the Botanica and the Mechanar! Shadow Labyrinth also required a key which dropped from the final boss in Sethekk Halls. In addition, you had to grind four dungeon reps to revered to unlock heroic mode in the first place (this requirement was lessened in patch 2.3, requiring a player to be honored instead). All of these questlines made TK’s attunement brutal to complete…but of course, we haven’t even gotten started yet. More on that later.
The attunement was removed as a requirement along with SSC’s during patch 2.1. The ability to gain the title was removed with Wrath’s launch. The quests still remain in the game for those who want to experience them, albeit with a much easier experience than in BC. The keys required to unlock various BC dungeons were removed in patch 4.2, as well as the keys to access heroic modes. Heroics can also now be entered at any reputation level, so there’s no grinding necessary. It shouldn’t take more than an hour or two to finish both the Cipher questline and the TK attunement quests.
Getting to TK is fairly simple. Head to the eastern part of Netherstorm; if you’re a goblin engineer, an Area 52 dimensional ripper will get you up there quickly. Otherwise, fly northeast from Shattrath or north from the Dark Portal. Tempest Keep is comprised of four floating naaru ships off the southeastern corner of the zone; the Eye is, naturally, the biggest.
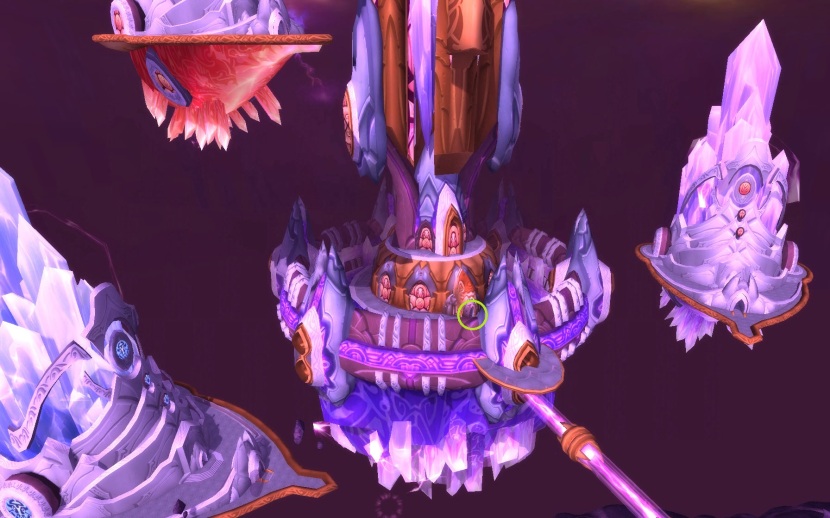
Botanica is in the lower left, Arcatraz is in the upper left, and Mechanar is on the right. The Eye is the big one in the center, and the portal to TK is the doorway highlighted by the green circle.
Bosses
Tempest Keep has a total of four bosses, and is much easier to solo than SSC. Just like SSC, the bosses can be tackled in any order, which posed the same problems with collecting T5 that I had in SSC! Again, since you’re alone, you’re free to do as much or as little as you want.
- Al’ar: Thanks to a change in patch 5.1, Al’ar is no longer immune to fire damage (he was the very last boss that was!), making this fight a cakewalk to solo. To avoid headaches in the second phase, clear the trash in the bottom level (the falconers and dragonhawks). You can ignore the dragonhawks upstairs if you wish, or clear them as well. Proceed up the left (west) ramp, and stop at the landing it leads to. Aggro Al’ar from here (big phoenix flying around overhead), as he will always move to the head of this ramp first. After about 30 seconds, Al’ar will fly to the next platform clockwise, where you’ll have to run to to continue the fight. Al’ar is fairly simple; he’ll cast a stacking debuff on you if you aren’t meleeing him, but this isn’t much of a deal. When he moves to another platform, he’ll spawn a smaller Ember of Al’ar; kill this before you continue, as it’ll knock out another three percent of his health. When he “dies,” jump down to the lower level, where he’ll respawn in the center. He does have a tremendous knockback that can push you all the way back up to the upper level, so don’t be standing in the middle when he spawns! All you have to do is burn him a second time and you’ll win. Occasionally he’ll perform an attack called Dive Bomb, which will render him unattackable for a few seconds, then land at your location and knock you back again. This will also spawn some more Embers, so kill them quickly to knock more health off. He can also spawn fire patches, which don’t do much but should still be avoided.
- Void Reaver: There’s a reason he was called Loot Reaver back in the day! This fight is kind of annoying for any spellcasters, enhancement shaman included, but isn’t too difficult to manage. Before you pull him, clear all trash in the room, as it will aggro onto you if you attack him. Void Reaver himself isn’t a difficult fight, save for the Arcane Bomb ability. This is a fairly large-radius explosion that targets a random player (you), travels towards them, and explodes, silencing anyone caught in its blast for six seconds. This also means no healing if you’re affected. It is possible to dodge these, but somewhat difficult. At the start, use your powerful cooldowns (Fire Elemental Totem, Ascendance, Stormlash, Feral Spirits) to gain a numerical advantage early on, and also because it’s difficult to use these when silenced. When he casts Arcane Bomb, it’ll be too late to dodge it; the only real way to outrun it is to be running away from Void Reaver when he casts it. Due to its very short cooldown, Void Reaver will spam the hell out of this ability. If you find yourself low on health and in need of a heal, use Spirit Walk. It’s an ability and not a spell, so you can use it while silenced to get away, heal up quick, then get back in the fight. He also occasionally knocks you back, which you can use to your advantage to make a temporary getaway. Other than that, the boss itself is fairly simple to burn down.
- High Astromancer Solarian: Not too difficult if you cheat it a bit. Once again, clear all trash, it WILL aggro if you attack her. Though you can pull everything and AOE it down, I would advise killing the Nether Scryers separately. They can mind control you and, since you’re the only one there, reset themselves and all the trash you’ve been working on rounding up! Stand as close to the entryway as you can, then pull Solarian. Line-of-sight pull her through the doorway and around its edge; doing so will allow you to negate her most powerful ability, Wrath of the Astromancer. This ability would normally launch you up about a hundred yards, likely killing you on impact. However, if you pull her into the entryway, you’ll only be launched up to its lower ceiling, a much safer height to fall from. Burn her down as normal. If you fail to get her down to 20% in 50 seconds, she’ll start an add phase. She’ll disappear and spawn a bunch of non-elite mobs, which are best handled with a Magma Totem (too little health to Fire Nova). She’ll reappear a short while later with two priests. They will heal her, but they won’t do nearly enough to outpace your damage. Below 20%, she’ll turn into a giant voidwalker, and the fight becomes a simple matter of finishing her off.
- Kael’thas Sunstrider: A five-phase fight, whoooooa. Before you start, clear all trash in his room; I have no idea if it aggros or not, but you’ll need the extra space. Before Mists, soloing Kael’thas involved a very complicated tactic revolving around pulling adds around the ENTIRE raid, and would take upwards of fifteen to twenty minutes to complete. Now, you have the health and DPS to manage it all in Kael’s room, so I’d advise doing so there. It’s still a little tricky, though.
Phase 1: Each advisor will activate in turn: Lord Sanguinar, Thaladred the Darkener, Grand Astromancer Capernian, and Master Engineer Telonicus, in that order. Each can be mopped up with a quick Stromstrike or Lava Lash, but you’ll need to position properly to have little trouble with Phase 3. My strategy is to run to the far side of the room after I activate the fight, then kill Sanguinar and Thaladred there. I then use Nitro Boosts or Spirit Walk to run back to Kael’s side and kill Capernian (beware her Arcane Burst) wherever she ends up, then run over to Telonicus and wipe him up there. This will keep Capernian and Telonicus far enough away to avoid their abilities at the beginning of Phase 3.
Phase 2: Seven legendary weapons will spawn in around Kael. None of these do any particular damage, so just AOE down with Fire Nova. The Cosmic Infuser will attempt to heal, but will not do enough to pose a threat. If you want to spam your guild’s news feed, loot all seven legendaries (AOE looting, yaaaay). Before the next phase starts, run back to where you left Sanguinar and Thaladred and wait.
Phase 3: Just before the phase starts, pop wolves, as you probably can’t use them during Kael (I’ve not tested it since their change from pets to guardians). All four advisors will respawn at once. Each has an ability that makes soloing annoying. Sanguinar will silence you, Thaladred will fear you, Capernian will cast Conflagrate on you and a slowing Arcane Burst if you get too close to her, and Telonicus will cast Remote Toy on you, stunning you for four seconds at random times for a minute. Quickly burn down Sanguinar (use Tremor Totem to break out of Thaladred’s fear), then Thaladred. Capernian next so she won’t Conflag you, then Telonicus last (as long as you get him down before Remote Toy expires, he poses the least threat). Use Healing Tide if you get too low, as well as Sham Rage and/or Astral Shift to reduce incoming damage. If you get through this part, you’ve basically won.
Phase 4: Kael will activate. So long as you have no pets out (not sure if wolves count now that they’re guardians), Kael will never MC you. Melee him and use Maelstrom heals to get yourself back to full quickly. Interrupt his Fireball whenever you can so he won’t cast it so frequently; it doesn’t hurt too bad, but anything to avoid incoming damage. He can cast Arcane Disruption, a ten-second disorient, and will likely cast it on you at least once before the phase ends, so be sure you keep your health up. If he casts a swirly fire thing on the ground, get out. If he spawns a phoenix, kill it, then kill the egg so it won’t respawn. When he gets to 50%, he’ll run back to where he started (if he’s not there already, free DPS time!) and talk some more before starting Phase 5.
Phase 5: Same as before, just burn him down. He’ll cast Gravity Lapse, which is an excellent time to use Ascendance. Watch out for the floating purple clouds that surround him, as they’ll stack a debuff on you called Nether Vapor, which reduces your max health by 10% each application. Stick close to him and they won’t be a problem. As long as you do a good job of avoiding the clouds, you’ll have it in the bag.

Notable Loot
Just like SSC, all trash mobs have a chance to drop Nether Vortexes, and Kael’thas is guaranteed to drop two. As previously mentioned, Nether Vortexes are used for various blacksmithing, leatherworking, tailoring, and alchemy recipes. In addition, all trash mobs can drop Marks of the Illidary, which are safely junked.
The rest of Tier 5 drops from two bosses in TK, and a matching belt drops here as well. Locations are:
- Shoulders: Void Reaver
- Chest: Kael’thas Sunstrider
- Belt (Girdle of Fallen Stars): Trash drop
If you’re unlucky with finding the belt, you can buy the Stormwrap from G’eras in Shattrath for 312 Justice Points. There are no bracers, though the gloves would be covering them anyway, so it’s not that big a deal. Thus, full locations for T5 are:
- Helm: Lady Vashj, SSC
- Shoulders: Void Reaver, TK
- Chest: Kael’thas Sunstrider, TK
- Gloves: Leotheras the Blind, SSC
- Legs: Fathom-Lord Karathress, SSC
- Belt: Trash, TK (Girdle of Fallen Stars), G’eras, Shattrath, 312 JP (Stormwrap)
- Boots: The Lurker Below, SSC (Tempest-Strider Boots), crafted by leatherworkers (Hurricane Boots)
In addition, we finally have a raid that actually has some good loot for enhance! There’s some other options here for ele and resto, but as always, we’ll start with enhance:
- One-handed Axes: Netherbane from Al’ar is a glowing purple crystal axe, with the crystals making up the blade floating in place. It’s a unique look, but it doesn’t hide enchants, so keep that in mind!
- One-handed Maces: Rod of the Sun King off of Kael’thas is a rather simple blood elf-themed mace. The purple crystal in the head also shoots out small arcs of lightning!
- Fist Weapons: Talon and Claw of the Phoenix, both drops from Al’ar, are probably some of the most visually striking fist weapons in the game. Talons that glow bright yellow and wiggle, blood elf shields covering the hands, and orange feathers poking out the top make for a beautiful set of fist weapons. Though initially main-hand and off-hand, both can be transmogged to either hand post-Mists, so you only need one if you wish to mog both hands!
And for other specs:
- Daggers: Heartrazor from High Astromancer Solarian is a simple red dagger with a subtle glow. Thick, sharp, and a little wicked looking.
- Staffs: Ethereum Life-Staff from High Astromancer Solarian is an excellent option for transmog, with bright blue crystals floating off the ends of an ornate staff, arcane circles surrounding them. The Nexus Key from Kael’thas is a green naaru-themed staff with floating rotating segments making up its head.
- Off-hands: Talisman of the Sun King from Al’ar is a very simple talisman in the shape of a draenei symbol, pink crystals floating in the head. Very small.
TK is a mount collector’s dream, as one of the most coveted mounts in-game drops off of Kael’thas, the Ashes of Al’ar. Probably one of the flashiest mounts in the game, the Ashes of Al’ar is a phoenix mount like Al’ar, which leaves a long pink trail behind it whenever it moves. It’s definitely good for showing off, and is a guaranteed head-turner. I’d advise not showing it off constantly, though, as you’ll probably draw the ire of others on your realm.
Kael’thas drops one of his Verdant Spheres, which you can turn in to A’dal for a necklace. This will also trigger A’dal’s Song of Battle, a two-hour buff which grants 10% extra Sha’tar rep from the Tempest Keep dungeons, as well as 5% extra damage while inside. Stick around Shattrath, though, as Kael’thas will appear and inform both you and A’dal that his demise was not as sure a thing as you thought it was, and that Kil’jaeden is on his way, foreshadowing the events of the Sunwell. More on that later!
Finally, all the blacksmithing, leatherworking, and tailoring patterns available to drop from SSC can also drop from trash and bosses in TK. If you have any of these professions, remember that you’ll need to farm up half the recipes on your own, and the other half can usually be bought off your auction house.
Battle for Mount Hyjal
The Battle for Mount Hyjal is the first raid of Tier 6. While officially it was added to the game at BC’s release with patch 2.0, it was not unlocked until patch 2.1. Hyjal was the first (and so far only) Caverns of Time raid, tasking adventurers with going back in time to the end of Warcraft 3 and help Jaina, Thrall, and Tyrande with the defeat of the Burning Legion at Mount Hyjal. At the time, this was WoW players’ only way to wander Hyjal, as the Hyjal zone in-game was unaccessible save for those who managed to sneak in.
Hyjal is still a bit of an oddity with regards to Caverns of Time instances. In the CoT dungeons released with BC, adventurers were tasked with defeating the Infinite Dragonflight and preventing them from mucking up the timeline. But there is no Infinite presence in Hyjal, nor is there any given story reason for going there. You just…do. One theory is that in the original timeline, the adventurers from the future were already there during the battle itself, and that going back in time ensures the Alliance and Horde’s victory over the Legion. Regardless, it does let you relive one of the pivotal moments in Warcraft history, so why do you need more reason than that?
Battle for Mount Hyjal initially required an attunement, which was simpler than those for the previous raid tiers. All it required was for raiders to kill Vashj and Kael’thas and retrieve their Vials of Eternity. Of course, this meant that raiders had to go through the attunements for SSC and TK, and all the attunements required for THEM as well. Though this was alleviated by the attunement requirements for SSC and TK being removed shortly after patch 2.1, this still meant killing the two end-bosses of the previous tier. Completing the original attunement quest from BC and the one for Black Temple rewarded the title “<name>, Hand of A’dal.” The attunement requirement for Hyjal was removed in patch 2.4, and the ability to gain the title was removed with Wrath’s launch. A new version of the quest is still available, but will not reward the title. I’d still recommend completing it, as it does provide you with a handy chunk of rep for Hyjal’s reputation faction. More on that in a bit.
Getting there is not as confusing as it used to be, now that the Caverns of Time has a zone map. The Caverns of Time are located in eastern Tanaris. The fastest way to get there for most players is to head to the Violet Citadel in Dalaran and either take the portal or talk to Zidormi upstairs on the left. She’ll provide anyone with a free teleport to the Caverns. There is a similar NPC called Zephyr in the World’s End Tavern in Shattrath, but she’ll only teleport you if you’re revered with the Keepers of Time. Once inside, follow the tunnel until you arrive in a large chamber. The portal to Hyjal will be the second tunnel on your right, the one with all the trees. If you get lost, just open your map and look for The Battle for Mount Hyjal. Alternatively, talking to the Steward of Time at the entrance will fly you down there automatically, and will deposit you right in front of the tunnel leading to Hyjal.
This view is from the end of the tunnel into the caverns. The portal to Hyjal is along the forested path to the right (not the burning trees!).
Bosses
Hyjal has a total of five bosses, and possibly the most annoying trash in any raid. Hyjal trash operates off of a wave format, in that a wave of adds will come on a timer, or after you kill all trash in the previous wave. Thankfully, each wave has its own trash it never deviates from, so planning is easy. For example, the first wave will always be 10 ghouls, the second will always be 10 ghouls and 2 Crypt Fiends, and the third will always be 6 ghouls and 6 Crypt Fiends. I won’t go in-depth here, as it’s all very easy to AOE the ground adds down. Aerials will come in later, but not before the first two bosses.
To start the raid, head through the Alliance portal in the entryway and talk to Jaina. You will need to do this upon arrival and after each boss to continue the raid. Eight waves of trash spawn before each boss, all coming from the direction of the Scourge base to the south. None will pose a threat to you.
- Rage Winterchill: Surprisingly, Rage is the only actually difficult boss in the raid, and he can pose a serious threat to you! This is mostly due to Death and Decay, which burns you for 15% of your maximum health per second. It’s also a VERY big effect, bigger than its graphic suggests, so when he casts it, get to running quickly. He can also stun you with Icebolt and root you with Frost Nova, and will do so VERY frequently. You likely won’t be frozen while there’s a Death and Decay out, but I can’t guarantee that. I’d advise burning cooldowns early to take off as much health as possible. Use healing and damage reduction cooldowns if you’re slow in getting away from Death and Decay; using Ascendance during one will help you get some free DPS time while he’s channeling, but make sure you’re not being damaged before you use it! Keep yourself alive, because a wipe will mean having to run through the eight waves of trash AGAIN. Once you get through him, though, the rest of the raid is easy, though time-consuming.
- Anetheron: Tank and spank. Don’t bother healing, as he reduces your healing effects by 75%. No real worries, though, as the damage is nowhere near high enough to warrant it.
After you talk to Jaina upon Anetheron’s defeat, she’ll tell you to fall back to the Horde base. Take the road to the east out of the Alliance base and follow it to the Horde base. Enjoy the scenery! When you get there, talk to Thrall; like before, you’ll need to talk to him after each boss to proceed. Note that during some waves of trash, gargoyles, infernals, and frost wyrms will spawn inside the base itself. Gargoyles can be brought down to ground level by interrupting their spells, infernals will spawn on the ground, and frost wyrms must be killed by ranged attacks.
- Kaz’rogal: Tank and spank. The only real effect he’ll have on you is a War Stomp, but that’ll only slow you down a bit.
- Azgalor: Tank and spank. He will occasionally silence you for five seconds, but the damage he puts out is not nearly enough to make that a problem.
After killing Azgalor, talk to Thrall and he’ll tell you to proceed to Nordrassil. Take the road east again, enjoy the pretty views, and ride to Nordrassil. You’ll need to proceed past the Night Elf camp, around the Well of Eternity, and to the field to the west. No more trash, just Archimonde!
- Archimonde: Tank and spank. Though he does have an ability to launch someone up into the air to be killed by fall damage (a la Solarian), he won’t cast that on the tank. Since you’re the only one there, by default you’re the tank, so you don’t even need to worry about a slow fall. He will curse you for 375,000 damage over 5 minutes, but this is not only easily healed through, but possibly won’t even be able to kill you, depending on your health! Dispel it safely at the end of the fight. When you get him down to about 300k health, the fight will be over. Enjoy the ending with the wisps killing him off, and collect your loot.

Reputation
The reputation faction for the Battle for Mount Hyjal is the Scale of the Sands, the third reputation associated with the Bronze Dragonflight (besides the Brood of Nozdormu and the Keepers of Time). The only thing we know about them is that they’re a secretive faction of the Bronze Dragonflight, presumably explaining why we don’t really know why we’re going to Hyjal in the first place (because they won’t tell us!). Previously, friendly reputation with the Scale was required to enter the raid, which was obtained through completing the Vials of Eternity attunement quest. Though the requirement has been removed, the quest is still a good way to kick off your Scale rep grind.
All trash in the instance after the first wave provides 12 rep apiece, with the exception of Frost Wyrms who provide 60. Blizzard removed the reputation from the first wave to prevent small groups from rep grinding off of the easiest pack. Boss kills give 375 rep, and Archimonde’s death gives 1500. A full clear will net you 7920 rep before reputation bonuses. This means it’ll take six weeks to grind Scale rep to exalted without bonuses, even with the attunement quest completed. With the guild rep bonus, it’ll only take five weeks, again regardless of if you complete the attunement. According to Wowhead, the various ring quests will provide a few chunks of rep, so go ahead and finish them as well.
Rewards for the faction include a series of rings available at every reputation level from friendly to exalted: one for melee, casters, healers, and tanks. The quests to get these can be picked up from Soridormi in the Caverns of Time. You can only get these rings if you do the Vials of Eternity quest first, also available from Soridormi; doing so will get you to friendly automatically, letting you pick out a ring immediately. The faction also contains a large assortment of jewelcrafting designs, available from friendly to revered, purchasable from Indormi in the portal room within the Hyjal instance. These can be obtained from a quicker faction to grind, but the designs are more expensive there (more on that later!).
Notable Loot
All trash mobs in the instance can drop Hyjal’s crafting material, Heart of Darkness. Hearts of Darkness are used in the creation of various leatherworking, tailoring, and blacksmithing recipes found in Tier 6 raids, as well as Ashtongue Deathsworn reputation recipes (who we’re getting to!). Otherwise, they’re fairly worthless, so you can vendor them if you don’t intend on making any of these.
Trash can also drop Marks of the Illidari which, as mentioned, are worthless. Feel free to junk ’em.
Along the paths between the various bases, you’ll find Ancient Gem Veins. Requiring 375 mining, they can contain a few BC rare or epic gems, as well as several gray gem fragments that sell for a good chunk of cash. As BC epic and rare gems are pretty worthless, even for leveling jewelcrafting, they’re all safe to vendor. It’s free money!
The Battle for Mount Hyjal is one of two raids that initially made up Tier 6, and as such is the source of part of our Tier 6 set: the Skyshatter Harness. One of the more iconic shaman sets, it invokes the power of lightning in its design. With glowing blue pauldrons that arc lightning between them, a veiled mask with glowing blue eyes, and ornate designs on the robe, it’s no surprise it’s an icon! Two pieces of Skyshatter can be obtained from Hyjal, as well as semi-matching boots and bracers (they’re actually from an incomplete black recolor, though they’re sort of on-par with the colors). Drop locations are:
- Gloves: Azgalor
- Helm: Archimonde
- Boots (Stillwater Boots): Rage Winterchill (sort of match)
- Bracers (Howling Wind Bracers): Rage Winterchill (sort of match)
Hyjal has a few options for enhance, more for ele and resto. Starting with enhance:
- One-handed Maces: Hammer of Atonement from Kaz’rogal is a crystalline purple mace with a rotating head. This matches paladin T5 very well, but works well for any purple set! For the same hammer in red, look for the Hammer of Judgement, a trash drop.
- Fist Weapons: Another iconic pair of fist weapons drops off of trash in Hyjal: the Fists of Fury. These two fist weapons (Fist of Molten Fury, Claw of Molten Fury) match the shaman T5 set perfectly, and make for an excellent look if you have the full set! They’re also the biggest fist weapons in the game, with spikes that go up past the shoulders, moving lava chunks, and a fiery orange glow throughout.
And for ele and resto:
- Daggers: Tracker’s Blade from Rage Winterchill is a sinister-looking dagger, a demonic skull with glowing red eyes for its hilt! You can get the same dagger with glowing green accents in Boundless Agony, which drops off of Azgalor.
- Staffs: Pillar of Ferocity off of Anetheron is a natural-looking staff that matches the druid T5 set, but again, given shamans’ natural tendencies, you can make an argument it works for them! Apostle of Argus from Archimonde is another very striking staff, with floating blue runic stones rotating to make up the “body” of the staff’s ends.
- Shields: Bastion of Light from Anetheron is a blue-and-silver, solid-looking shield with a glowing blue gem in the middle, good if you want a thick option! Kaz’rogal’s Hardened Heart from Kaz’rogal is another big shield, with a pulsing spiky heart in the center, very demonic. For a still-demonic but more subdued option, Antonidas’ Aegis of Rapt Concentration off of Archimonde is a good choice, a horned green-eyed demon skull making up the crest of the golden shield.
- Off-hands: Chronicle of Dark Secrets, dropping from Rage Winterchill, is one of many book off-hands. This one looks much more demonic and seems barely able to hold the power contained within its pages! Scepter of Purification from Archimonde is similar to the Talisman of the Sun King, but with yellow crystals instead of pink.
Finally, there’s a large variety of recipes to be had here! Trash has a chance to drop a large assortment of leatherworking, tailoring, and blacksmithing plans (eight, four, and four, respectively). Similar to SSC, the recipes for the shoulders are BOE, while the shoulders they create are BOP; conversely, the recipes for the bracers are BOP, while the bracers themselves are BOE. In addition, trash and bosses can drop eight BOP jewelcrafting designs for BC epic gems. Worthless for their products, but if you’re a completionist, it’s the only way to obtain these designs.

Black Temple
Released in patch 2.1 in May 2007, the Black Temple is the second (and originally final) raid in Tier 6. It’s all come down to this. You’ve taken on Illidan’s top lieutenants and crumbled his grip on Outland, and now it’s time to storm his stronghold. Kill Illidan and his forces will be all but defeated, and Outland will be free from his grasp.
Even though Illidan had informed everyone that they were not prepared, the ability to enter his lair in the Black Temple was unlocked only four months after BC launched. As I mentioned earlier, Blizzard released tiers 4 and 5 with BC’s launch, and then added in tier 6 with its first patch. After this, there was no more raid content planned for the expansion, as they figured that Wrath of the Lich King would be finished fast enough to let BT be the end of BC raiding. However, delays almost always crop up in game development, and Wrath was no exception. If nothing had been done about this, raiders would have had nothing beyond BT for a year and a half. This was alleviated in patches 2.3 and 2.4, but this did make BC end on an odd note, given how heavily advertised Illidan was. It’s weird to make the central character in your game’s cinematic not the final boss! We’ll cover these later raids in a bit. But first, we’ve gotta deal with Illidan!
Black Temple required what is considered to be the toughest attunement in WoW’s history, when you consider all the requirements to get in. Attunement for the Black Temple required raiders to not only complete various questlines, but ALSO required various boss kills in SSC, TK, and Hyjal, each of which required their OWN attunements to get in, some of THOSE attunements requiring ADDITIONAL attunements to complete! In short, it was a nightmare for any raid group that needed to attune more people, which is why the attunement requirement was removed in patch 2.4. Completing it and Hyjal’s attunement used to reward the Hand of A’dal title as previously mentioned, but this ability was removed with Wrath’s launch. The questline remains in the game, and its reward is still useful! The Blessed Medallion of Karabor from the final quest in the chain will allow you a free teleport to the Black Temple, which does make for the fastest way to get there.
Speaking of getting there, it’s not too terribly hard to if you don’t have the medallion. Head to the eastern side of Shadowmoon Valley; flying east from Shattrath is still pretty quick. Contrary to most people’s first expectations, the entrance is not the front door, but a crack on the southern wall. Enter the raid portal there to get in.
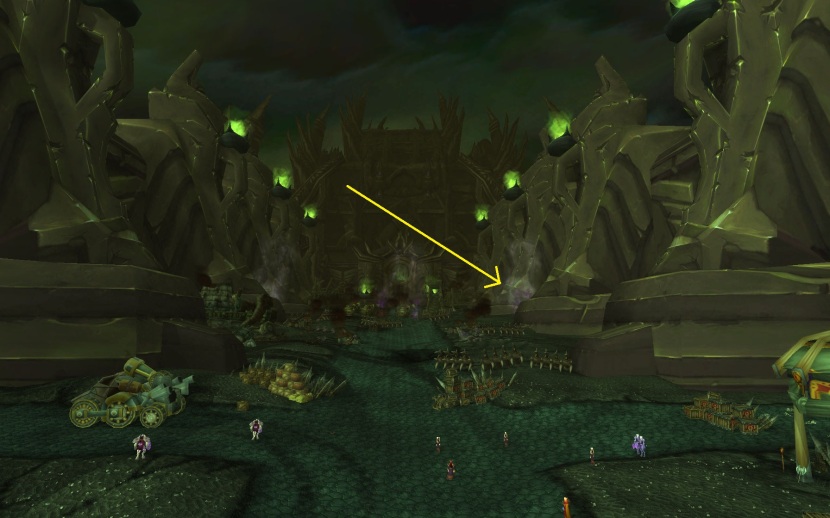
Over here on the right side towards the back.
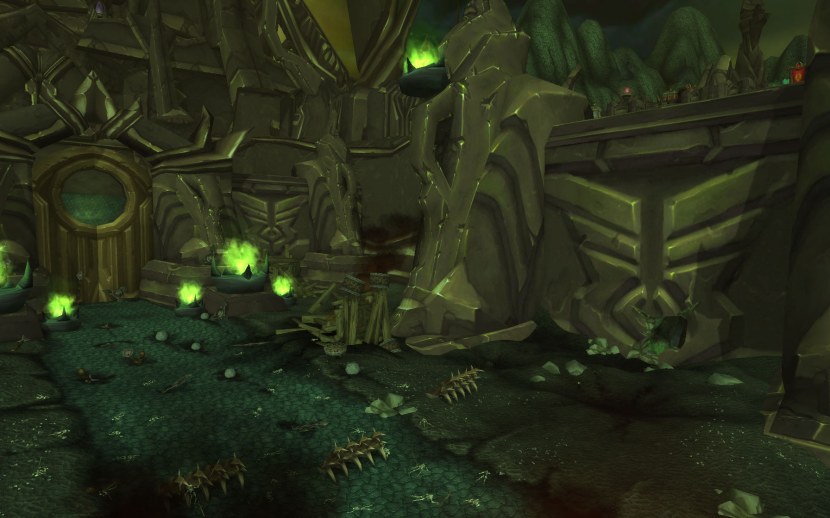
That crack in the wall on the right houses the portal.
Bosses
Black Temple has a total of nine bosses, with a linear-nonlinear-linear structure. The first two bosses are killed in order, the next four can be killed in any order, and the final three must be killed in order. The order I give the bosses in is my suggested order! Most of the bosses are easy, but the final two will pose some difficulty.
- High Warlord Naj’entus: Tank and spank. He won’t spike you as you’re the only target (and thus the tank), and you can burn him down fast enough to avoid him putting up the shield.
- Supremus: Tank and spank again. It’s easy to burn him down before the kite phase, but even the kite phase isn’t terribly difficult. He’ll just knock you back occasionally.
- Shade of Akama: Such a simple fight, you shouldn’t even bother with cooldowns! After clearing all trash in the room, talk to Akama who’s stealthed near the door. Kill the channelers surrounding the Shade, and wipe up the adds that spawn. When the Shade becomes active, just burn him down. No difficulties.
- Teron Gorefiend: Tank and spank. He won’t use his Shadow of Death ability on you, so just burn him down normally.
- Reliquary of Souls: A three-phase fight. During the first phase (Suffering), you won’t be able to heal, but the damage output is too low to matter. The second (Desire) is the toughest, but has been nerfed. Its aura will deal 50% of the damage you deal to it back to you, but it’ll also double your healing, so it makes good sense to use wolves to keep yourself healed up. Make sure you don’t blow yourself up, and you’ll be fine. The final phase (Anger) is fairly simple, as its aura will deal a pitiful amount of damage to you over time, but will also boost your damage; these effects increase over time. Just burn it down and you’ll be done. In between phases, weak adds will spawn; standing near them when they die will heal you for about a third of your health.
- Gurtrogg Bloodboil: Tank and spank, though you’ll need to keep yourself healed. Gurtrogg will stack two bleeds on you, which will get to a semi-annoying level towards the end of the fight. Wolves will keep you topped off, and healing totems can also help keep your health up. Apart from these, the boss is simple.
- Mother Shahraz: Tank and spank. She’ll silence you for ten seconds every so often, but there won’t be enough damage to make that a problem. She’ll also create an aura that makes one spell school’s damage stronger, and another weaker, always in one of three pairs (fire/frost, arcane/nature, holy/shadow). If fire or nature is stronger, it’ll make your fight a bit easier, but regardless it’s an easy boss.
- Illidari Council: Here’s where things get a bit tricky. The Illidari Council is composed of four members: Lady Malande (priest), High Nethermancer Zerevor (mage), Gathios the Shatterer (paladin), and Veras Darkshadow (rogue). The bosses have a shared health pool that will redistribute between them frequently; the encounter won’t end until the full health pool is depleted. You should focus on Lady Malande, as she can cast Circle of Healing and restore some of the group’s health. This is interruptible, though at times she will go immune to spells, which also means she’ll be immune to spell-based interrupts like Wind Shear. Make sure you interrupt if you can! Otherwise, burn them all down. There will be a LOT of incoming damage, so make good use of healing and damage reduction cooldowns. You also might want to lust for some extra speed on taking them down.
Remember to talk to Akama when he comes in before running upstairs! You need him to unlock the door!
- Illidan Stormrage: For the most part, it’s a pretty simple fight. Phase 1, DPS as normal. At 65%, Illidan will take off and throw his warglaives down, beginning Phase 2. Before Phase 2 starts, stand in the center of the circular grate, so you’ll be within 25 yards of both Flames of Azzinoth. When they spawn, kill them quickly. If you stand near one, the other will charge you and enrage, dealing 500% damage (which is pretty hefty, even at 90!), but it’s survivable. When they’re dead, Phase 3 will begin. The rest of the fight is just burning Illidan down. You’ll deal enough damage to avoid Phase 4 (the demon phase) entirely. At 30%, you’ll be stunned for a bit while Maiev Shadowsong, Illidan’s former jailor, walks in to help out. This starts Phase 5, but there’s really nothing to worry about here. Just finish him off to complete the raid.

Reputation
Black Temple has its own reputation, the Ashtongue Deathsworn. A group of Ashtongue Broken under the leadership of Akama, they initially allied themselves with Illidan to get revenge on the fel orcs of Shadowmoon Valley, and assisted him in ousting Magtheridon from the Black Temple. Given Illidan’s demonic tendencies, this really just meant swapping one big bad for another, so Akama bode his time until he could bring Illidan himself down. The jailing of Maiev gave him the opportunity he needed, along with the arrival of a group of adventurers, allowing him to put his plans into motion.
Just like other raid reps, the Ashtongue Deathsworn is primarily raised through kills in Black Temple. Completing the BT attunement chain will also reward a few thousand reputation. A full clear of all trash and bosses in BT will award about 8000 rep before any reputation bonuses are factored in, so the time to grind it to exalted is about the same as that for the Scale of the Sands: 5-6 weeks. Completing the attunement chain won’t have much effect on the time it takes to finish the grind, but it’s full of lore!
Rewards for the faction include an assortment of leatherworking, tailoring, and blacksmithing recipes at friendly and honored, which created four-piece shadow resistance sets (as well as one shadow resistance cloak tailors can make), which were useful for surviving an assortment of later bosses in the raid. In Mists, resistances are no longer a thing, so the sets themselves are pretty poorly itemized when you factor out their resistance bonuses. At exalted, a class trinket can be purchased, provided you’re not a DK or monk; they’re fairly worthless nowadays, unless you like pretty useless trinkets. All of these items can be purchased from Okuno in the center of the Sanctuary of Shadows; he will become friendly after you defeat the Shade of Akama.
Notable Loot
Just like mobs in Hyjal, mobs in Black Temple have a chance to drop Hearts of Darkness, used in an assortment of leatherworking, tailoring, and blacksmithing recipes found as drops or through Ashtongue reputation rewards. The dropped shoulder recipes do look pretty distinctive, and the reputation recipes provide you with various purple legs, bracers, belts, and boots. If you don’t intend on making any, vendor ’em.
And just like all the previous T5 and 6 raids, trash can drop Marks of the Illidari. Junk ’em.
Trash mobs also have a pretty good chance to drop various uncut BC epic gems. You’ll likely get at least one per trash pack you pull. Like before, these are pretty worthless (if a lower-level player wants to use gems, they’ll use Wrath ones for better stats!), so they’re safe to vendor.
BT is also where the remainder of our T6 pieces are found, as well as a matching belt and semi-matching boots and bracers. Drop locations are:
- Shoulders: Mother Shahraz
- Legs: Illidari Council
- Chest: Illidan Stormrage
- Bracers (Bands of the Coming Storm): Supremus (sort of match)
- Belt (Naturalist’s Preserving Cinch): Supremus
- Boots (Boots of Oceanic Fury): High Warlord Naj’entus (sort of match)
So, full drop locations for Tier 6 are:
- Helm: Archimonde, Battle for Mount Hyjal
- Shoulders: Mother Shahraz, Black Temple
- Chest: Illidan Stormrage, Black Temple
- Gloves: Azgalor, Battle for Mount Hyjal
- Legs: Illidari Council, Black Temple
- Bracers: Rage Winterchill, Battle for Mount Hyjal (Howling Wind Bracers, sort of match); Supremus, Black Temple (Bands of the Coming Storm, sort of match)
- Belt: Supremus, Black Temple (Naturalist’s Preserving Cinch)
- Boots: Rage Winterchill, Battle for Mount Hyjal (Stillwater Boots, sort of match); High Warlord Naj’entus, Black Temple (Boots of Oceanic Fury, sort of match)
Being a nine-boss raid, Black Temple has a large variety of transmog opportunities no matter what class you are, and enhance is no exception:
- One-handed Axes: Rising Tide off of High Warlord Naj’entus is a vicious orange-and-steel axe with a gem in the center of the blade that looks very much like an eye! A little bit creepy, and good for a brutal look. The Brutalizer from Supremus is another big axe, this one a yellow-and-gunmetal color. It’s got quite a bit of heft to its design!
- One-handed Maces: Syphon of the Nathrezim from Supremus is a small but deadly-looking mace, with an evil red head that looks like a crystal carved in the shape of a skull. The same model can be obtained as the Swiftsteel Bludgeon from trash. Crystal Spire of Karabor off of Illidan Stormrage is a big mace with a soft blue glow and ornate blue-and-silver designs that goes really well with Skyshatter! For some reason, Hammer of Judgement is here as well, still a trash drop.
Ele and resto have their fair share of options as well:
- Daggers: The Maelstrom’s Fury from High Warlord Naj’entus is a simple blue dagger with a yellow glowing orb above the back of the blade. Messenger of Fate off of Gurtrogg Bloodboil is a deadlier yellow dagger with a massive blade, and fel green smoke rising off the top. Shard of Azzinoth from Illidan Stormrage is as close as we’ll get to wielding Illidan’s glaives, and matches his signature weapons’ fiery green glow.
- Staffs: Staff of Immaculate Recovery off of Gurtrogg Bloodboil is quite an angelic staff that matches priest T5. It’s a beautiful staff, but if you happen to be running BT with a priest friend, I’d let them have it. Likewise, if you’re running with a warlock, let them have Zhar’doom, Greatstaff of the Devourer from Illidan Stormrage. It’s basically a felhunter on a stick, complete with moving jaws and claws!
- Shields: Felstone Bulwark off of Supremus is similar to the Bastion of Light from Hyjal, save for its brown coloration and red gem in the middle. Illidari Runeshield, a trash drop, is a smaller red shield with horns along the top and green Illidari symbols on its front. But for amazing shields, nothing beats the Bulwark of Azzinoth from Illidan Stormrage, a positively massive curved purple shield that usually outsizes its bearer! Spikes along its front make for one hell of a deadly-looking shield!
- Off-hands: Blind-Seers Icon from the Shade of Akama is a simple hand-covering with a flaming design. Touch of Inspiration from the Reliquary of Souls is one of a thousand crystalline off-hands from BC, this one a pinkish-purple.
- Two-handed Axes and Maces: Torch of the Damned off of the Reliquary of Souls is a purple mace with a rotating head surrounding a bright purple flame. Definitely stands out! Meanwhile, Soul Cleaver from Teron Gorefiend is an absolutely brutal-looking golden axe, complete with a massive glowing head and spikes down its back.
If you’re a warrior, rogue, DK, or monk (why are you on a shaman blog?), then Illidan has one more drop to look for, or rather two: the Warglaives of Azzinoth. Illidan’s fabled weapons are some of the simplest legendaries to get; all it takes is luck. They’re a fairly low drop rate, and to get credit for the feat of strength, you’ll need to get boththe main- and off-hand glaives and equip them. Now if only Blizzard would let shaman wield swords…
Finally, trash and bosses have a low chance to drop all the same leatherworking, tailoring, and blacksmithing recipes that Hyjal trash can drop. Just as before, shoulder patterns are BOE, shoulders are BOP; bracer patterns are BOP, bracers are BOE.
Sunwell Plateau
The final raid of BC, Sunwell Plateau was released in patch 2.4 in March 2008, and is sometimes referred to as the only raid of Tier 6.5. As I mentioned, though Black Temple was initially going to be the end of BC raiding, eventually the need to put in more raid content was realized as delays kept Wrath from ending up in players’ hands. The culmination of this need was Sunwell Plateau, which carried forward the story foreshadowed by Kael’thas’s not-quite demise. With Tempest Keep being merely a setback, Kael’thas set forth to the Sunwell on the Isle of Quel’Danas to summon Kil’jaeden, bringing about another invasion of the Burning Legion.
Patch 2.4 introduced quite a few things to WoW, such as its first dedicated dailies zone, the Isle of Quel’Danas, whose story progressed as players on each realm worked to help the Shattered Sun Offensive retake the Isle from the Legion and Kael’thas’s remaining forces. The Isle was also home to an extra dungeon, Magisters’ Terrace, and a raid, Sunwell Plateau. The extra raid content proved a difficult challenge, though most of this was due to overtuning. Due to its late release (Wrath would launch eight months later) and position atop the BC raiding tree, SWP was only seen by less than one percent of BC’s player population when it was current content. I’m sure some guilds decided against raiding it due to the next expansion being on the horizon.
SWP was also the first raid in BC since Gruul and Magtheridon’s Lairs to not have an attunement requirement. This basically marked the end of attunements in WoW; they would still crop up again in a much smaller form occasionally, but gone were the days of having to run practically every raid (even the ones you’d already had on farm for months) to get one more person attuned.
To get to SWP, you have two options. The first (and easiest) is to take the portal to the Isle of Quel’Danas from Shattrath; you’ll find it in one of the smaller side chambers in A’dal’s room. Alternatively, if you have the flight path (which you should automatically get upon passing level 70? I dunno, find out for yourselves), you can fly there from any point in the Eastern Kingdoms; the fastest points are from Silvermoon City for Horde, or Ironforge for Alliance. The Ironforge flight path will not fly all the way there, but will teleport up to near the Isle once it leaves Ironforge. Once you’re on the Isle, follow the main road to the southwest across a bridge. The raid portal will be at the end of the road in the side of the massive building.
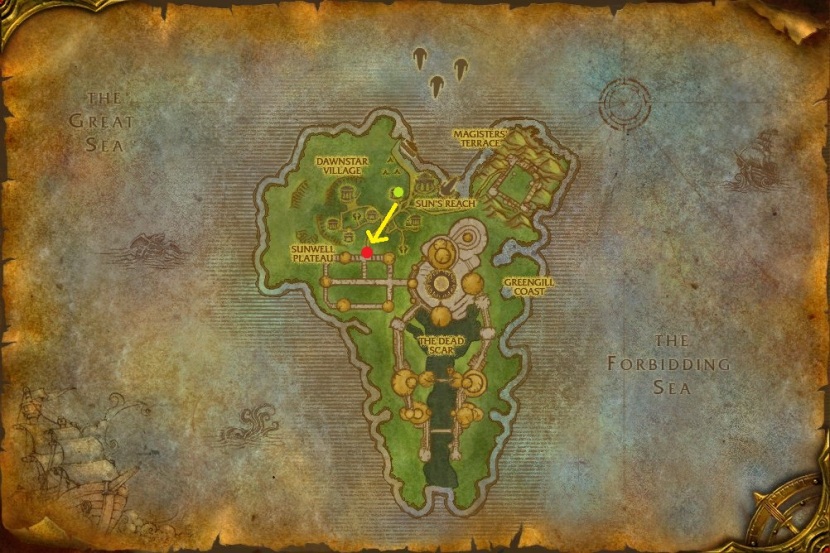
The green dot is where the portal to Quel’Danas will take you. The red dot is the raid portal.
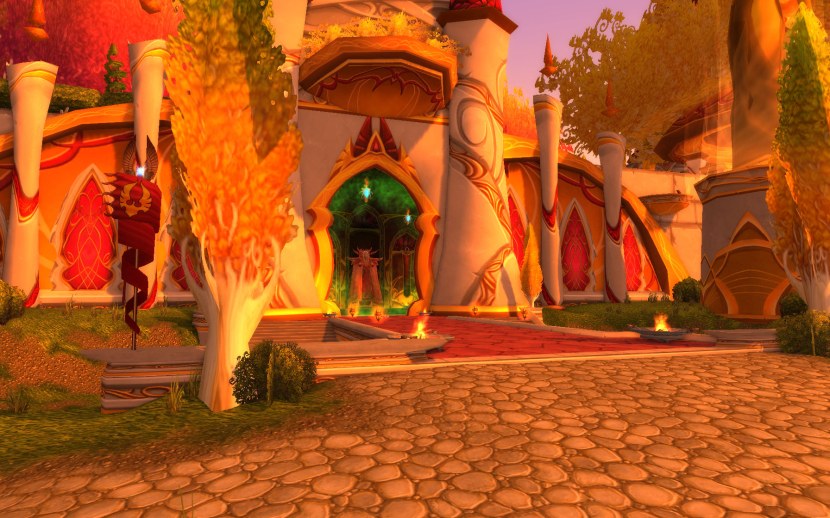
The portal, naturally.
Bosses
Sunwell Plateau has a total of six bosses. The first three were available at the start and tuned to be as difficult as T6 raiding, while the successive three were gradually unlocked over the ensuing months, each harder than the last. Most of the trash is before the first, fourth, and fifth bosses, but don’t pull too much at once! The Sunblade Slayers have an ability called Slaying Shot, which deals 25% of your maximum health in damage every 2 seconds for 8 seconds. That’ll drop your health real quick and make you an easy target for the rest of the trash to pick off even if you DO heal up, so make them a priority to kill!
- Kalecgos: Alas, this is the first boss we run into that simply cannot be soloed. And it’s the first boss of the raid! Yes, Kalecgos is mechanically impossible to solo. The fight involves two phases that go on simultaneously. The first is fighting Kalecgos himself in the real world, while the second takes place in a spectral realm where a demon, Sarthrovarr the Corruptor, fights Kalec for control of the dragon’s body. Normally, the fight is won by someone going down to the spectral realm, killing Sarthrovarr, and returning to the real world to finish off Kalecgos. Unfortunately, if there is no one in the real world (if you’re soloing and you go into the spectral realm, for instance), Kalecgos will reset entirely. Thus, unless the fight is changed somehow, you’re better off duoing if you want something from Kalecgos. If you don’t, you can skip him by skirting the edges of his platform and continuing through the raid. If you die, you won’t have the luxury of being teleported to his platform, but at least you won’t be stopped entirely!
- Brutallus: I’d say that Brutallus is the toughest fight in the instance, due mostly to the fact that you’ll be soaking up every single Meteor Slash by yourself. This hard-hitting ability starts out doing 20k damage to you (it would normally be split amongst others it hit, but since you’re the only one, you get to soak it all), but also applies a stacking debuff that increases the fire damage you take by 75%. Thus, the second will hit for 35k, the third will hit for 50k, the fourth for 65k…let’s just say that by the time you get up to 10 stacks, it’ll be difficult if not impossible to heal yourself enough to survive the next one. By 25, it’ll be a one-hit kill no matter what. You will want to do everything you can to burn him as quickly as possible; flask/food buff are optional, but can only help. At the start, pop fire elemental, lust, Ascendance, and Stormlash in that order to maximize burst; use any trinkets you can, as well as Synapse Springs if you’re an engineer. Save wolves for a bit later to help with healing, as well as any healing or damage reduction cooldowns. Use Healing Stream frequently early on to keep your health up, and Healing Tide when the damage gets really bad. The fight is basically a gear check, so if you’re having too much trouble, gear up some more and try again. I beat him with mostly MV gear, so let that be a benchmark. You’ll have to wait a bit for Felmyst to spawn.
- Felmyst: Felmyst has two phases she alternates between, ground and air. Ground is fairly basic dragon things, while air involves spawning zombies and breathing mind control gas on various sections of the area. You can go about Felmyst one of two ways. The first is to burn her 6.1 million health in one minute so she doesn’t go into an air phase; the second is to accept that as inevitable and just deal with the air phase. I attempted the former, waiting for my sated debuff to clear so I could have lust again, but I just barely missed the deadline. However, since you’re soloing, it’s a lot easier not to fuck up an air phase (less people to screw up), so don’t be afraid of it! Burn her as normal in the first ground phase, then when she takes off, kill the zombies that spawn. Then, watch for where she breathes the mind control fog and get out of the way before it hits you; it’ll be an instant reset if it does. If you don’t trust your own judgement on where she’ll breathe, run to the opposite edge of the area and wait in Ghost Wolf form; this will give you plenty of time and speed to run out of where she breathes. When she lands, finish her off just like the first ground phase.
- Eredar Twins: Grand Warlock Alythess and Lady Sacrolash are somewhat a pain, but not undoable. The best way to go about killing them is Alythess first, then Sacrolash. They have a variety of abilities that will make you lose control temporarily, but if you have wolves or a healing totem out then you’ll heal through the damage. Kill Alythess first, then Sacrolash. Each has a stacking debuff of the fire (Alythess) or shadow (Sacrolash) schools; the debuffs are removed if you take damage of the opposite school. I didn’t catch what Alythess’s did, but Sacrolash’s reduces the healing you can do on yourself. Apparently, drinking a Sulfuron Slammer from the Grim Guzzler in BRD counts as fire damage to remove the debuff, so taking a couple could help if you have trouble. Otherwise, just burn them down, using damage reduction cooldowns to keep yourself alive longer if the debuff stacks too high to effectively heal.
- M’uru: Though he used to be a guild-breaker, M’uru is now a very easy burn. In phase 1, just DPS him quick; use him to spread Flame Shock to quickly Fire Nova the adds that spawn. In phase 2 when he changes to Entropius, you can pretty much ignore everything and burn him down. No abilities really messed with my capacity to finish the fight.
- Kil’jaeden: For the final boss of BC, Kil’jaeden’s kind of a joke to solo (yes, I know every boss in BC got a flat 30% nerf when Wrath hit, but still). He has a very wide assortment of attacks, but none of them really stand out as doing anything severe. His knockback coupled with Soul Flay can make meleeing a bit annoying as you slowly run back into melee range, but that’s the only difficulty. The damage he puts out is so low you can easily heal through it. When he makes shadow copies of you, you can even use them for Fire Novas for extra damage! I would recommend lusting, though, as it’s still a lot of health to burn through. After he’s dead, loot and watch the finale! Unless you’ve seen it already, in which case loot and hearth.

Reputation
While SWP doesn’t have its own reputation, and none can be ground in the raid itself, I’d be remiss not to bring up the reputation for the Isle, the Shattered Sun Offensive. The Aldor and Scryers, realizing the gravity of the threat to Azeroth if Kil’jaeden manages to succeed in entering through the Sunwell, put aside their differences and formed the Shattered Sun Offensive to retake the Isle of Quel’Danas from the Legion and put a stop to Kil’jaeden’s plan.
Reputation with the SSO is gained through completing various daily quests on the Isle, as well as by running the normal or heroic versions of Magisters’ Terrace. More daily quests would open as the Isle’s phase progressed, which was a direct result of players’ efforts. Today, a couple dozen full clears of Magisters’ Terrace make for the fastest way to finish the rep grind.
Rewards for the faction include enchanting, jewelcrafting, and alchemy recipes, as well as a few weapon options for transmog. I particularly like the shields in the shape of the SSO crest! In addition, all the jewelcrafting designs from the Scale of the Sands are available here, along with quite a few extra; however, the designs here are MUCH more expensive, at 50 gold a pop before faction discounts! I’d advise you to buy the designs from the Scale first to save cash; it’s not like it’s hard to grind anyway! Finally, for hitting exalted, you can complete a quest where you donate 1000 gold to the SSO, rewarding you with the title “<name> of the Shattered Sun.” A pretty neat title!
Notable Loot
Sunwell Plateau has its own crafting material, Sunmotes. These can drop off of any mob in the instance, as well as any boss beyond Kalecgos (with guaranteed drops from the Eredar Twins and Kil’jaeden), and are used in some of the various recipes from SWP. Sunmotes are also used as currency to change some drops from the raid into differently-named and -itemized versions of themselves. The looks (as far as I’m aware) are exactly the same, so unless you intend on making some of the SWP recipes, I would just vendor them.
And just like in BT, trash can drop uncut BC epic gems. Vendor away.
HEY GUESS WHAT TRASH CAN ALSO DROP MARKS OF THE ILLIDARI I’LL BET YOU’RE JUST AS TIRED OF THROWING THESE AWAY AS I AM
Sunwell Plateau has the unique distinction of being the only raid to increase the size of a raid tier’s set, adding a belt, boots, and bracers to the T6 sets, making them eight-piece sets (though not granting any set bonuses beyond four pieces). The reason this was done was so that players could hang onto their 4-piece set bonus while replacing their gear with higher ilvl pieces. Sadly, these pieces match the Sunwell armor sets and not the original T6 armor appearance (except the warrior set, for some reason). Still, if you’re a tier set completionist, here’s where to get the final pieces of T6:
- Bracers: Kalecgos
- Belt: Brutallus
- Boots: Felmyst
The Eredar Twins have a chance to drop any of these tokens as well.
The mail sets from SWP have a unique look, though they’re all recolors of each other. I won’t go into how to get them, as there’s far too many and none are specifically shaman sets. Check Wowhead for pics and drop locations.
If you’re looking for blood elf- or demon-themed weaponry, SWP is a great place to go. Starting as always with enhance:
- One-handed Maces: Reign of Misery off of Brutallus is a fairly simply designed dark mace with a green glow in the center of its head. Archon’s Gavel from the Eredar Twins looks a bit draenei in design, a simple tan mace. Hammer of Sanctification off of Kil’jaeden is similar to Reign of Misery, but with a much larger, solid head and a green glow towards its hilt.
- Fist Weapons: Hand of the Deceiver from Kil’jaeden and Grip of Mannoroth from the Eredar Twins used to be a main-hand/off-hand fist weapon set, though both are now one-handed. They’re ornate, have some green fire, and are very round in shape. Mounting Vengeance, a trash drop, is on the other end of the spectrum: dark, subtle, and spiky as hell.
Ele and resto have their fair share of options as well:
- Daggers: Fang of Kalecgos from Kalecgos is a blood elven gold and black dagger, simple in shape but elegant in design. Shiv of Exsanguination from the Eredar Twins is of similar design, with a glowing purple orb in its hilt. Crux of the Apocalypse from Kil’jaeden is a twin-bladed dagger of similar coloration, but with gold streaks branching off it periodically. Sunflare, also off Kil’jaeden, is a smaller, bright red dagger.
- Staffs: Grand Magister’s Staff of Torrents off of Felmyst is a simply-designed silver staff with a small head. If you want sleek and simple, it’s a good choice. Stanchion of Primal Instinct from the Eredar Twins is another natural-looking staff that probably fits a druid better, but you can still argue works for shaman. Golden Staff of the Sin’dorei off of Kil’jaeden is basically the blood elf crest on a stick. Pretty.
- Shields: The other stupidly-big shield from BC, Sword Breaker’s Bulwark from Felmyst is a big red-and-gold blood elven shield, another good one to show off with. For a smaller, more ornate shield, Aegis of Angelic Fortune from M’uru is a triangular shield with orbs hanging off it.
- Off-hands: Heart of Misery off of Brutallus is quite large for an off-hand, with fierce horns and a beating heart on its crest. Definitely flashy. Book of Highborne Hymns from the Eredar Twins is a big red-and-gold book with a very large handle on its spine.
For anyone that can wield ranged weapons (hunters primarily, but also rogues and warriors), Kil’jaeden has a low chance to drop the second and final of BC’s legendaries: Thori’dal, the Stars’ Fury, a legendary bow. There’s really no lore to say just where it came from, but it’s pretty flashy nonetheless. Thori’dal was unique at the time in that it didn’t require ammunition, it generated its own. Though Cata removed ammo entirely, making this effect worthless, the bow was given its own special effect in 4.1 (according to Wowhead contributors), making it shoot magical arrows you can watch sail through the air, including a glowing effect on the bow itself as you fire. Pretty neat.
Lastly, all trash in the instance has a chance to drop A VERY LARGE ASSORTMENT of leatherworking, tailoring, blacksmithing, jewelcrafting, and engineering recipes. For leatherworking, tailoring, and blacksmithing, the chest patterns are BOE with BOP results, while the glove patterns are BOP with BOE results. For the jewelcrafting designs, the necklace designs are BOE with BOP results, while the ring designs are BOP with BOE results. The engineering schematics are all BOE, and shaman can learn all three mail schematics. In addition, miners can get the Study of Advanced Smelting, a very common drop which teaches them how to smelt Hardened Khorium, used in a few of the SWP recipes. The study will only drop if a miner who hasn’t learned it is in the raid.
Former Raids
If you’ll recall, I mentioned in the Black Temple intro that the raid content problem was alleviated in patches 2.3 and 2.4. Obviously, Sunwell Plateau was the 2.4 raid, but what about 2.3? Why didn’t I go over its raid? The reason is simple: it got removed.
Zul’Aman was a 10-man raid introduced in patch 2.3, both to give the game some much-needed content (2.2: voice chat?) and to provide a means of catching up that didn’t involve running through previous tiers of raiding, much like the 20-man raids of Classic. The Amani trolls have always been a problem for the blood elves, but during BC they saw fit to rise up and begin plotting an attack on Silvermoon itself. Adventurers were tasked with entering their walled city of Zul’Aman and putting an end to their leaders to quash their uprising. Its three-day lockout meant that players could run the short raid frequently, allowing them to get the gear to catch up and get into Tier 5 and 6 raiding, its loot above Karazhan’s in quality, and often on-par with T5 loot. Skilled raiders could also go through a timed run of the raid, in which four hostages would be executed unless the four bosses guarding them were defeated. Each successfully-freed hostage would reward the raid with an extra piece of loot, and rescuing all four would reward the Amani War Bear, the game’s first bear mount (and a fierce one at that!). There was even a blue toad, Mojo, who you could collect!
Sadly, the original version of the raid was removed in patch 4.1, rereleased as a Cataclysm heroic 5-man in that same patch. I’ll cover that in part 4 which, given the time it takes to write these, will be out in 2016 or so. Mark your calendars!
Conclusion
Congratulations! You’ve reached the end of this stupidly long guide, which at this count is over 19,000 words long! Fuck!
In all seriousness, I hope this guide helps my fellow enhancement shaman out with their soloing endeavors in BC. Even with our 20-level advantage over the content, a few encounters can still prove tricky! And to those of you who aren’t shaman, these techniques can be applied to your own classes as well! Just apply your own abilities and experiment to find what works best for you. Use my guide as a starting point if you need to, I don’t mind!
In part 3 (due out Soon™), we’ll dive into Wrath of the Lich King’s raid content (mostly 10-man) and talk about how to solo content designed for level 80’s, as well as finally get back to a legendary shaman can wield! Yay!

Found your guides via google, and I’m loving them! And I’m not even playing a shammy!! Keep up the good work, awaiting pt.3 with anticipation 🙂
Ditto SilverCRX. Found your guides very useful. Excellent work.